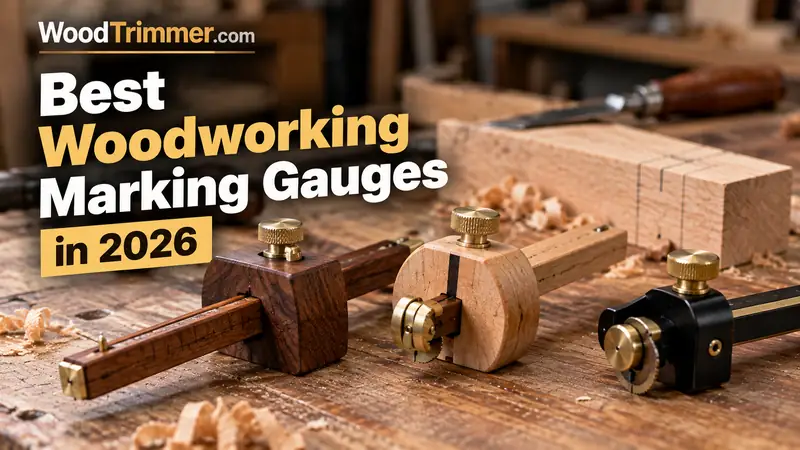
Best Woodworking Marking Gauges in 2026
A marking gauge is one of the simplest ways to turn a measured dimension into a repeatable line. Instead of trying to reproduce an offset by eye, you set the gauge once, keep its fence against a reference edge, and transfer the same relationship to the workpiece.
Quick Picks
| Pick | Best for | Why it stands out |
|---|---|---|
| Clarke Brothers Wheel Marking Gauge | Best Overall | Stable wheel-gauge design, dual graduations and replacement cutters. |
| iGaging 34-707 | Best Simple Precision Choice | Traditional wheel gauge with 1/32-inch and 1 mm graduations. |
| iGaging 34-711 | Best for Mortise & Tenon Layout | Dual-cutter capability plus micro-adjustment for joinery layout. |
Why a Marking Gauge Matters in Precision Woodworking
A marking gauge does more than draw a line. Its real advantage is repeatability. Once the fence is registered against a reliable reference edge, the cutter reproduces the same offset without requiring you to read a ruler for every pass.
That matters when laying out tenon shoulders, rebates, dados, drawer parts, casework dimensions and other joinery where several parts must relate to the same reference.
The 3 Best Woodworking Marking Gauges
1. Clarke Brothers Wheel Marking Gauge
Best for: general woodworking layout

A strong first marking gauge for a woodworker who wants one practical wheel gauge for everyday layout, joinery shoulders and repeatable edge offsets.
Check Price on AmazonKey specifications
- 8-inch solid-metal bar
- Graduated inch and millimeter scale to 6 inches / 150 mm
- Roll-stop fence with a flat spot for stable registration
- Two replacement hardened-steel wheel cutters
- Solid brass, steel and aluminum-alloy construction
- Stable reference fence makes repeated parallel marks easier
- Wheel cutter is well suited to clean layout lines
- Dual imperial/metric graduations reduce setup steps
- Includes replacement cutters
- The graduated beam is a setting aid, not a calibration standard
- A wheel gauge is not a substitute for a dedicated mortise gauge when two lines must be set independently
2. iGaging 34-707 Wheel Marking Gauge
Best for: straightforward precision layout

The best fit when you want a conventional wheel marking gauge with useful graduations and a solid construction without making the tool more complicated than necessary.
Check Price on AmazonKey specifications
- 0–6 inch / 150 mm graduated range
- 1/32-inch and 1 mm graduations
- Solid brass head
- 8-inch steel shaft
- Hardened alloy-steel marking blade
- Can also be used as a depth gauge
- Simple mechanism keeps the workflow straightforward
- Dual-scale graduations are useful for mixed-unit shops
- Brass head and steel shaft provide a solid, traditional feel
- The cutter can be used for more than basic edge marking
- It does not provide the same dedicated micro-adjust mechanism as the more specialized gauges
- Graduations help you set a dimension but do not prove the gauge is calibrated
3. iGaging 34-711 Mortise Gauge + Wheel Marking Gauge
Best for: mortise-and-tenon joinery

The specialist choice for woodworkers who regularly cut mortise-and-tenon joints and want one tool that can handle both ordinary edge marking and dual-line mortise layout.
Check Price on AmazonKey specifications
- Micro-adjustable marking system
- 1/32-inch and 1 mm graduations
- Solid brass body with steel shaft
- Two mortise cutters plus support components
- Can also function as a wheel marking gauge and depth/transfer tool
- Two cutters let you establish both sides of a mortise from one reference face
- Micro-adjustment is useful when fitting joinery precisely
- Combines general marking and mortise-layout functions
- Compact precision-oriented design
- More setup complexity than a basic single-wheel gauge
- The dual-cutter arrangement is unnecessary for simple one-line layout
- Cutters still need to be kept sharp for clean results
Wheel Gauge vs. Pin Gauge vs. Mortise Gauge
Not every marking gauge solves the same problem. For most precision layout, a wheel cutter is attractive because it physically severs wood fibers rather than simply dragging a point through them. Veritas describes its hardened wheel as cutting fibers cleanly even across the grain, while Woodpeckers emphasizes the registration benefit of a cut line for chisels and saws.
| Gauge type | Best use | Main advantage | Main limitation |
|---|---|---|---|
| Wheel marking gauge | General layout, shoulders, rebates, repeated offsets | Clean, controlled scribe line | One cutter normally gives one reference line at a time |
| Pin marking gauge | Traditional along-the-grain layout | Simple and inexpensive | Can be less clean across the grain |
| Mortise gauge | Mortise-and-tenon layout | Two parallel lines can be established from one reference | More specialized and more setup-sensitive |
Accuracy, Repeatability and Resolution Are Different
Woodworkers often use these words as if they mean the same thing. They do not.
- Resolution is how finely the tool lets you read or adjust a dimension.
- Accuracy is how close the resulting setting is to the intended dimension.
- Repeatability is whether the tool returns to the same setting and produces the same result again.
A gauge can have fine graduations and still be a poor precision tool if its fence shifts, its cutter moves, or the operator cannot register it consistently. That is why WoodTrimmer does not choose winners by the smallest number printed on the beam.
How to Check a Marking Gauge Before Trusting It
1. Check the fence
Set the fence against a known straight reference edge and make sure it sits flat without rocking. A large or stable reference face can make consistent registration easier.
2. Check the cutter
The cutter should be sharp enough to score rather than crush the fibers. If the line looks fuzzy, inspect the cutter before blaming the gauge.
3. Perform a repeatability check
Set the gauge to a chosen dimension. Mark the same reference edge several times without changing the setting. Then compare the lines. Next, deliberately reset the gauge and return it to the same dimension. If the result changes noticeably, investigate the locking mechanism, fence or technique.
4. Verify the result against the actual workpiece
For critical joinery, use the actual mating component as the reference whenever practical. A scale reading is useful for setup; the fit of the parts is the final woodworking test.
How to Choose the Right Marking Gauge
Choose a wheel gauge if you want one everyday layout tool
For most woodworkers, a wheel marking gauge is the logical starting point. It handles repeated offsets and joinery layout without being limited to a single specialized joint.
Choose micro-adjustment when fine fitting is common
Micro-adjustment becomes valuable when you frequently sneak up on a shoulder, groove or joinery dimension instead of moving the fence in large increments. Veritas uses a fine-pitch mechanism for controlled cutter movement, while Woodpeckers uses a fine-thread adjustment barrel.
Choose a mortise gauge when mortise-and-tenon work is routine
If your projects regularly require two parallel layout lines, a dedicated dual-cutter system can save repeated measuring and help preserve the relationship between the mortise and tenon.
Do not confuse graduations with calibration
Graduations make a tool faster to set. They do not automatically prove that the scale, cutter position and fence are perfectly calibrated. For high-precision work, verify the result against a known reference or the mating part.
Common Marking Gauge Mistakes
- Using a blunt cutter and expecting a crisp line.
- Holding the fence inconsistently against the reference edge.
- Changing the reference face halfway through a layout operation.
- Trusting a graduation without checking the actual fit of the parts.
- Buying a complex mortise gauge when most of the work only needs one parallel line.
- Assuming a finer adjustment mechanism automatically makes every woodworking operation more accurate.
Who Should Buy a Marking Gauge?
Buy one if: you build furniture, cabinets, drawers, boxes or joinery where repeated dimensions matter; you want cleaner layout lines; or you are moving beyond pencil-only layout.
You may not need one yet if: your work is mostly rough construction, large outdoor projects, or tasks where exact parallel offsets are rarely important.
Frequently Asked Questions
What is the best marking gauge for woodworking?
For a general-purpose starting point, the Clarke Brothers wheel gauge is the strongest all-around choice in this guide. If you want a simpler conventional wheel gauge, the iGaging 34-707 is a good fit. For regular mortise-and-tenon work, the iGaging 34-711 is the more specialized option.
Is a wheel marking gauge better than a pin marking gauge?
For precision joinery, a wheel cutter is often preferable because it creates a controlled cut line. A pin gauge can still be useful for traditional layout, especially where the grain direction makes tearing less of a concern.
Do I need a micro-adjust marking gauge?
Not necessarily. Micro-adjustment is most useful when you frequently make small controlled changes while fitting joinery. For straightforward repeated layout, a simpler locking mechanism may be faster.
Can a marking gauge replace a marking knife?
No. They overlap in purpose but not in every task. A marking gauge is particularly good at repeating an offset from an edge. A marking knife is more flexible for transferring lines with a square, marking dovetails and establishing other layout references.
How accurate does a woodworking marking gauge need to be?
It needs to be accurate enough for the joinery and repeatable enough to reproduce the intended relationship. In woodworking, the stability of the reference edge, the sharpness of the cutter and the repeatability of the setting can matter more than another decimal place on a specification sheet.
Final Verdict
The Clarke Brothers Wheel Marking Gauge is the best all-around starting point in this three-product test because it combines a practical wheel cutter, stable registration features, dual graduations and replacement cutters.
The iGaging 34-707 is the cleaner choice for someone who wants a straightforward precision wheel gauge without adding specialized mortise hardware. The iGaging 34-711 earns its place when mortise-and-tenon layout is a regular part of the workflow.
The larger lesson is more important than the winner: a marking gauge is valuable because it transfers a relationship repeatedly. Set it from a reliable reference, keep the cutter sharp, and verify critical settings against the work rather than trusting a scale alone.
Related WoodTrimmer Guides
- 8 Best Woodworking Layout Tools of 2026
- Different Types of Measuring Tools
- Woodworking Square Tools
- Best Woodworking Scribe Tools
- Woodworking Measuring Tools
Publishing Checklist
- Confirm Amazon product availability before publishing.
- Keep the affiliate disclosure visible near the beginning.
- Check that all three Amazon links retain the
tag=shahedru-20tracking parameter. - Confirm the three Amazon product images load correctly after pasting into WordPress.
- Add the article to the appropriate WoodTrimmer layout/measurement category.
- Use the supplied 1280×720 WebP as the featured image.
- After publication, add the final live URL to future WoodTrimmer internal-link planning.
Editorial note: This guide intentionally avoids invented prices, ratings, hands-on testing claims and unsupported precision numbers. Amazon listings and manufacturer specifications can change.