If you’re stepping into woodworking, you might assume you need a garage full of gear to build anything worthwhile. But the truth is, you don’t need every tool on the shelf—just the right ones. The must-have woodworking tools aren’t about quantity or brand prestige; they’re about functionality, precision, and safety. With a smartly curated set, you can build furniture, cabinets, shelves, and more—starting with projects as simple as a coffee table or bookshelf.
The key? Build your workshop like a pro: project by project, tool by purpose. This approach keeps costs down, prevents clutter, and ensures every tool earns its place. You can assemble a capable, future-proof shop for under $1,500—even with high-quality gear—if you buy wisely. Skip the cheap tools that wobble and wear out fast. Instead, invest in durable models, buy used when possible, and grow your collection as your skills evolve. Whether you’re using hand tools, power tools, or a mix of both, the foundation of great woodworking lies in accuracy, control, and intention.
Here’s how to build a workshop that works—starting with what you already own and adding only what you truly need.
Start Smart: Build a Workshop That Grows With You
Buy Tools for Projects, Not Lists
Too many beginners blow their budget on tools they’ll rarely use. The smarter path? Adopt a project-driven approach. Pick your first build—say, a floating shelf or a basic cabinet—then buy only the tools required to complete it. Need clean crosscuts? That’s your cue to get a miter saw. Smoothing surfaces? Add a random orbital sander. This way, every tool has immediate value and purpose.
Avoid all-in-one starter kits. A $100 drill set might seem like a deal, but the bits dull after one use. Better to buy a single high-quality chisel or drill bit and learn to maintain it. Tools are investments—quality beats quantity every time.
Power Tools That Deliver Real Results
Miter Saw: Your Most-Used Cutting Tool
While the table saw handles long rips, the miter saw dominates crosscuts. It’s faster, safer, and more accurate for cutting legs, frames, trim, and moldings. Many woodworkers use their miter saw more than their table saw—especially for repeat cuts.
Types to consider:
– Compound miter saw: Cuts angles in two planes (miter and bevel)
– Sliding miter saw: Handles wider boards with ease
Set it up with stop blocks, and you can crank out identical parts in minutes. For most home shops, a 10″ sliding compound miter saw strikes the perfect balance of power and precision.
“You will use your miter saw pretty much every time you are woodworking.”
Ditch the Circular Saw—Get a Track Saw
If you’re breaking down sheet goods like plywood or MDF, skip the circular saw. It’s hard to guide, lacks dust control, and often leaves tear-out. Instead, upgrade to a track saw. With a guide rail, it delivers laser-straight cuts, minimal splintering, and built-in dust extraction.
The Festool track saw is the gold standard, but budget models from DeWalt or Makita outperform most circular saws. Even if you keep a circular saw for rough work, the track saw should be your go-to for precision sheet goods.
Random Orbital Sander: The Finishing Game-Changer
Hand-sanding a tabletop can take hours. A random orbital sander cuts that time by 80% while delivering a swirl-free, professional finish.
Top picks:
– DeWalt (~$60): Reliable entry-level option
– Bosch (~$150): Better ergonomics, less vibration
Look for:
– Direct dust port (skip the bag)
– Compatibility with 3M Extract net sandpaper
– Variable speed control
Use 120–180 grit for final smoothing before finishing. Pair it with a sanding block for edges and contours.
“Best power tool for swirl-free finishing.”
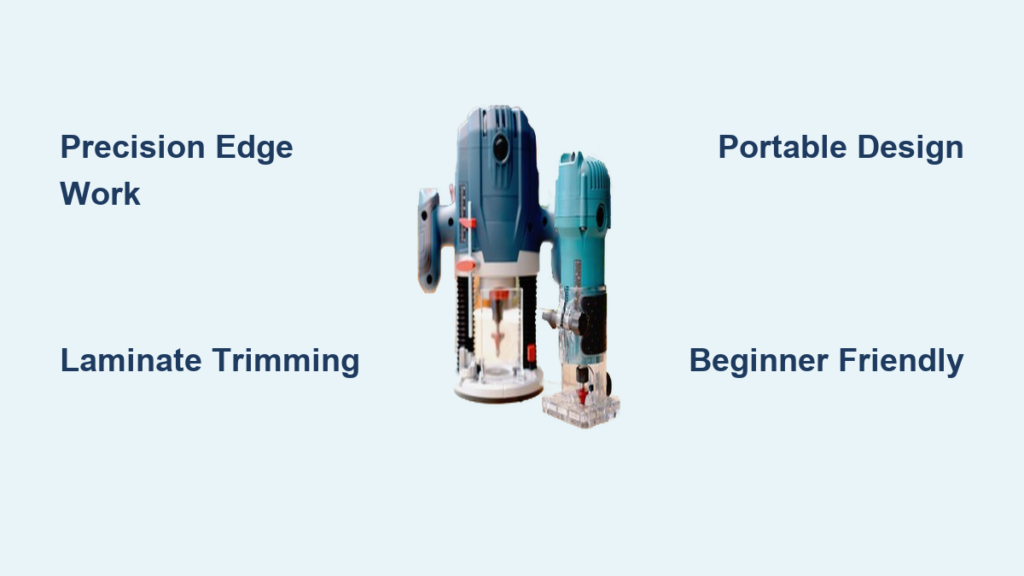
Router: The Most Versatile Power Tool
The router shapes edges, cuts grooves, and creates joints—making it essential for cabinetry, tabletops, and decorative details.
Start with a plunge router and a small set of high-quality bits:
– Chamfer
– Roundover (1/8″)
– Flush-trim
– Straight bit
Avoid cheap Amazon bit sets—they burn wood and dull fast. Invest in Freud, Amana, or Infinity bits. They cost more upfront but save time and frustration in the long run.
Jigsaw: For Curves and Cutouts
Need to cut a sink hole or scrollwork? The jigsaw is your go-to. It excels at internal cutouts, curved cuts, and irregular shapes.
Blade tips:
– Narrow blade = tighter curves
– Wide blade = straighter cuts
– Orbital action = faster cutting (turn off for clean wood cuts)
Choose corded for power or cordless for convenience—match it to your existing battery system (e.g., DeWalt 20V Max).
Drill Press: Precision You Can’t Fake
A drill press ensures perfectly vertical, repeatable holes—critical for dowels, hinges, and joinery. Hand drills wobble; drill presses don’t.
Even a small benchtop model pays off when drilling multiple holes. Use depth stops for consistency. It’s not for every job, but when accuracy counts, it’s invaluable.
“Invaluable for precise, repeatable, and perfectly vertical holes.”
Band Saw: Curve Cutter and Resaw Machine
The band saw excels at curves, resawing thick stock, and cutting irregular shapes. It’s safer than a table saw for small pieces.
Not essential for beginners, but critical as projects get complex—like turning a 4×4 into two 2x4s. Just note: it’s not ideal for straight ripping unless fitted with a quality fence.
Jointer and Planer: Master Rough Lumber
Joint One Face, Plane the Other
The jointer flattens one face and squares one edge—creating a reference surface. Without it, your wood won’t glue up flat.
Use it before the planer, which thicknesses the opposite face to a uniform dimension.
Benefits:
– Use rough-sawn lumber (cheaper than pre-dimensioned)
– Reduce trips to the wood store
– Customize thickness
A 6″ jointer and 13″ planer are ideal starting sizes.
“Using a jointer will ensure your wood is straight and true.”
“Owning a planer will mean less trips to the wood store.”
Hand Tools for Control and Craft
Chisels: Joinery Cleanup Essential
Chisels clean mortises, pare joints, and shape details. You need:
– 1/4″, 1/2″, 3/4″, 1″ (standard sizes)
– 1-1/2″ or 2″ (for fast waste removal)
Buy 3–4 high-quality chisels (e.g., Lie-Nielsen, Marples) instead of a full cheap set. Keep them sharp—dull chisels slip and cause injuries.
“Essential for joinery and clean-up work.”
Hand Saws: Precision Without Power
Japanese Pull Saws Dominate
- Ryoba saw: Cuts on pull stroke—cleaner, more accurate
- Tenon saw: Fine joinery
- Coping saw: Tight curves and internal cuts
- Stanley Fat Max: Durable all-rounder for rough work
Cutting tips:
– Clamp workpiece
– Cut on the waste side of the line
– Use arm swing, not wrist
– Point finger along cut line
“Home center coping saws are a temporary bandaid, but will make you a very discerning customer.”
Hand Planes: Shave Like a Razor

Hand planes flatten, smooth, and refine surfaces. Think of them as wood razors.
Types:
– #4 Smoothing plane: Final prep before finish
– #5 Jack plane: General-purpose
– #7 Jointer plane: Long edge flattening
A tuned plane leaves a glass-smooth surface—no sanding needed.
“A plane works like a razor, shaving off small layers of wood.”
Measure, Mark, and Layout Right
Squares: Accuracy Starts Here
Speed Square for Angles
- Mark 90° and 45° lines
- Acts as a guide for circular saws
Combination Square
- Layout lines
- Check depth
- Verify squareness
Large Square (18″x24″)
Essential for cabinets, tables, and big glue-ups.
“Test it in-store—ensure the lock tightens securely.”
Tape Measure: Keep It Reliable
The Stanley Power Lock 12-foot is compact, durable, and easy to read. Skip 25–30 ft models—they’re overkill in the shop.
“A reliable, durable tape measure is critical.”
Marking Tools: Lines That Last
- Marking knife: Sharper than pencil; use for joinery
- Box cutter: DIY marking knife
- Marking gauge: Consistent layout
- Calipers: Measure thickness—some call it the “most-used tool”
- Angle finder: Replicate odd angles
- Carpenter’s pencil: Flat, easy to sharpen
- Sharpie: Label parts, track progress
Pro tip: Use multiple light passes with a marking knife—don’t force it.
Clamps and Workholding
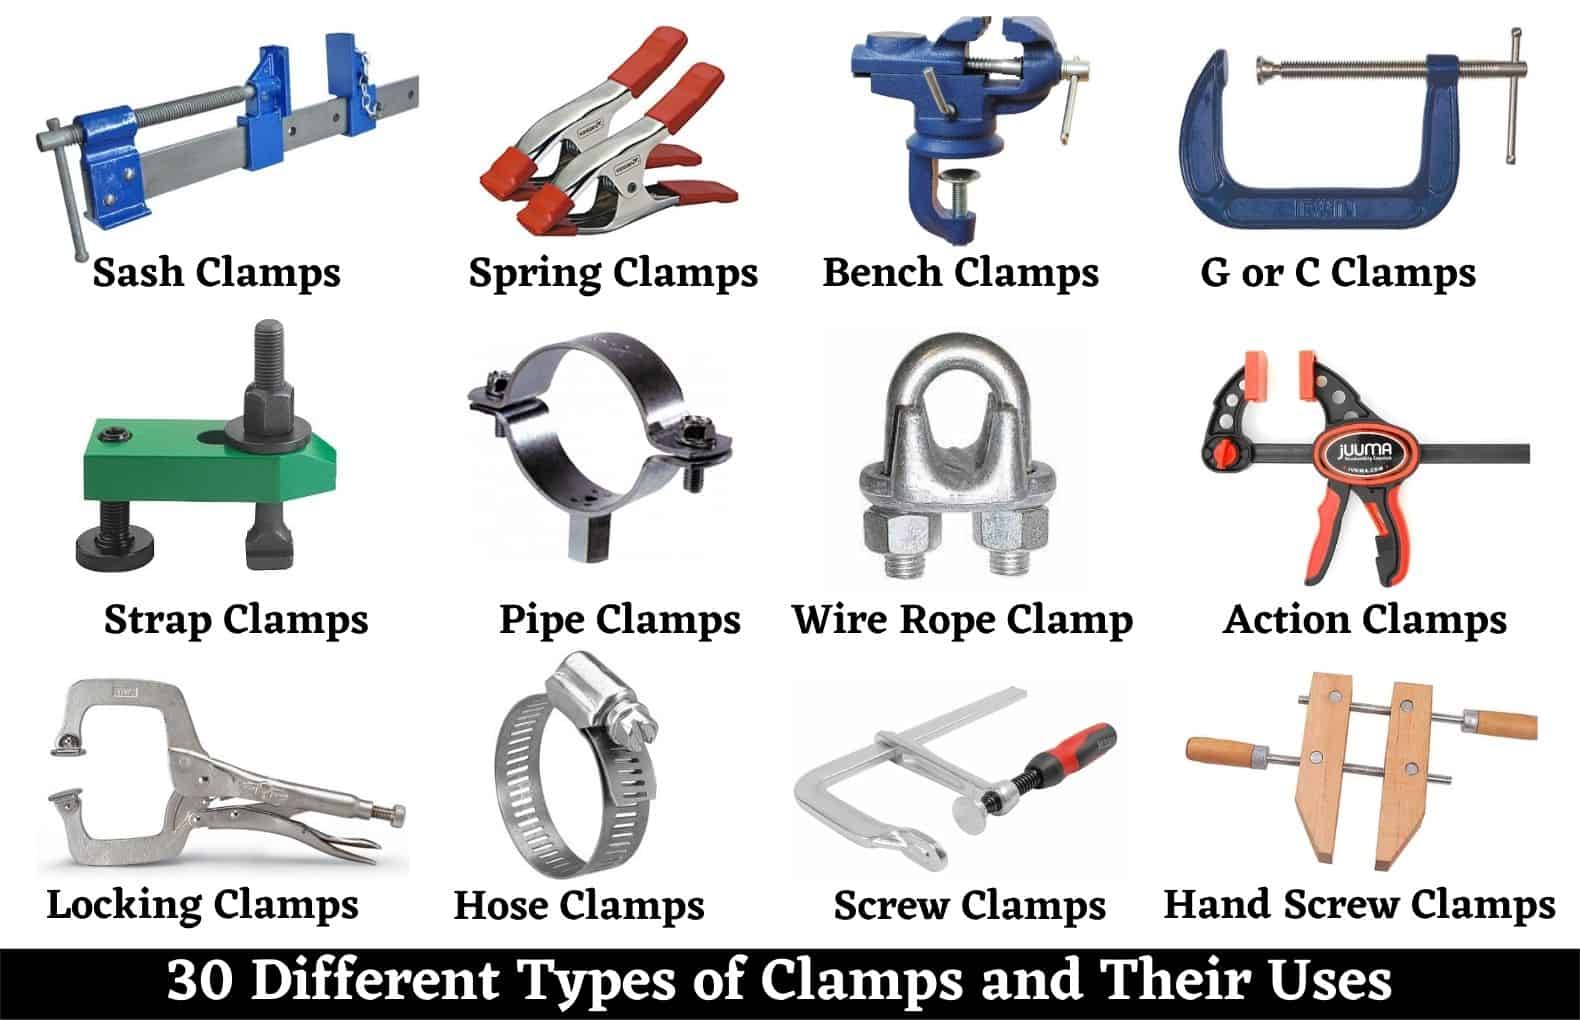
Clamps: You Can Never Have Too Many
Types:
– Bar (F-style): Strong, versatile
– Pipe clamps: Cheap for long spans
– Parallel clamps: Even pressure on wide glue-ups
– Spring/quick-release: Fast setup
– Band clamps: Irregular shapes
Buy 6″, 8″, and 12″ F-clamps first. Add pipe clamps for tabletops.
“Quick-release clamps are lifesavers, especially when working by yourself!”
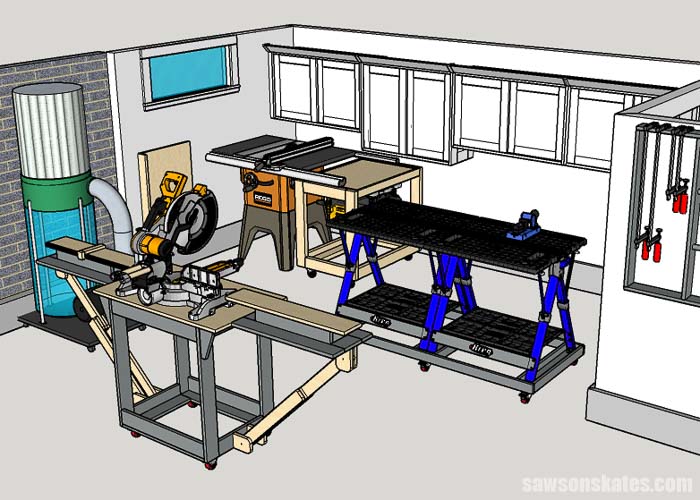
Workbench and Support
Sturdy Workbench
- Height: Slightly lower than table saw (doubles as outfeed)
- Flat, solid top
- Add a bench vise (find used, clean, refinish)
Sawhorses
Minimum: Two, ideal: Four
Top pick: Woodburro—stackable, strong, stores tools
Crosscut Sled
DIY accessory for table saw:
– Safer than miter gauge
– More accurate crosscuts
– Costs under $50 in materials
Dust and Safety: Protect Your Health

Respirator: Breathe Safely
Wood dust causes long-term lung damage. Always wear a reusable respirator with:
– Pink 100-series filters (for dust)
– Organic vapor cartridges (for finishes)
3M models are reliable and widely available.
“Sawdust and other chemicals can seriously damage your lungs.”
Eye Protection: Non-Negotiable
Safety glasses must be worn during all operations. Prescription options like Eggles or John Mlei’s shop shades are game-changers for glasses wearers.
“Always wear eye protection.”
Hearing Protection: Silence the Noise
Power tools are loud. Use:
– Foam earplugs + over-ear muffs = best protection
– Never rely on AirPods or earbuds
“AirPods or earbuds are NOT hearing protection.”
Dust Collection: Clean Shop, Longer Tools
Shop Vac
Get a high-performance model (~$100 at Home Depot):
– 1.5″ or 2″ hose
– Add a muffler if noise bothers you
– Use with dust separator to extend filter life
Net Sandpaper
3M Extract paper has holes that align with sander—pulls dust efficiently. Avoid cheap paper—it scratches and wears fast.
“A good shop vac is non-negotiable.”
Push Stick: Upgrade for Safety
Factory push sticks are flimsy. Upgrade to a Big Horn Push Stick:
– 3/4″ wide
– Grippy surface
– Retractable hook
– Replaceable bottom
$30 well spent—lasts years.
First Tools to Buy (With What You Have)
You already own:
– ✅ Table saw
– ✅ Circular saw
– ✅ Kreg Jig
– ✅ Dremel
– ✅ Basic tools
Prioritize These Next
| Tool | Why It Matters | Price |
|---|---|---|
| Miter Saw | Most-used crosscut tool | $200–$500 |
| Random Orbital Sander | Fast, clean finishing | $60–$150 |
| Quality Clamps | Secure glue-ups | $10–$40 each |
| Squares (Speed + Combo) | Layout accuracy | $15–$40 |
| Drill/Impact Driver Set | Fasteners and holes | $100–$200 |
| Workbench & Sawhorses | Workholding base | $100–$300 |
| Crosscut Sled | Safer table saw use | <$50 (DIY) |
Final Note: The best workshop isn’t the most expensive—it’s the most thoughtful. Focus on accuracy, safety, and workflow. Buy tools that solve real problems, not marketing hype. Prioritize quality, durability, and function. As your skills grow, so will your needs. But the foundation of great woodworking isn’t in the tools—it’s in the craftsman’s hands, mind, and respect for the wood.