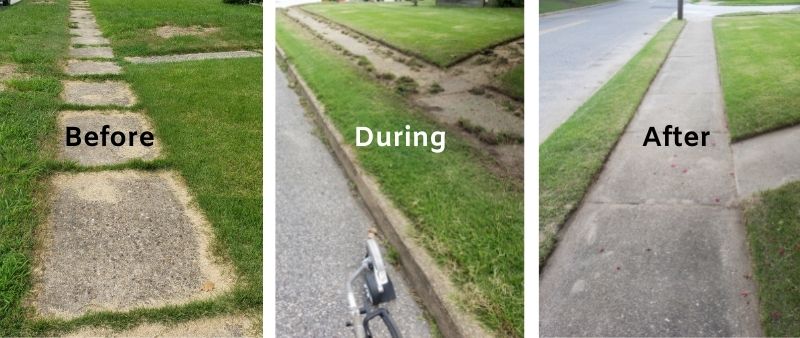
Nothing transforms a sloppy lawn into a showpiece faster than clean, defined edges along your sidewalks, driveways, and garden beds. While many homeowners rely solely on mowers for lawn maintenance, mastering how to use a weed eater to edge unlocks professional results without expensive dedicated equipment. The right string trimmer technique creates razor-sharp borders that prevent grass from creeping onto hard surfaces while dramatically boosting your property’s curb appeal. This guide reveals the exact methods landscape professionals use to achieve picture-perfect edges with standard weed eaters—saving you hundreds on specialized tools while giving you complete control over your landscape’s definition. You’ll learn proper angles, movement techniques, and maintenance strategies that work on any lawn surface, from concrete driveways to delicate garden borders.
Select Your Edging-Ready Weed Eater Model
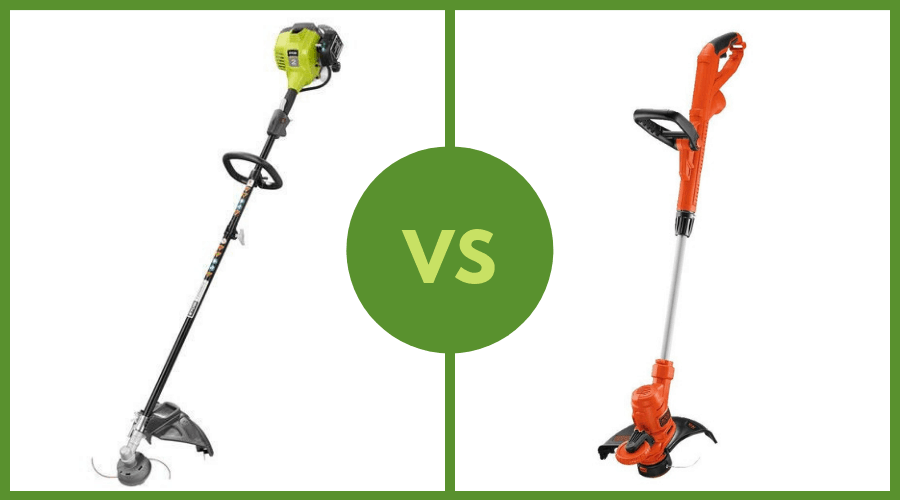
Gas-powered trimmers deliver the raw power needed for tough edging jobs on large properties, with their higher RPM creating cleaner cuts through thick grass along concrete edges. The freedom of movement without cords or battery limitations makes them ideal for properties over half an acre, though they require proper fuel mixing and generate more noise. For most suburban yards, modern battery-powered models now match gas performance while offering quieter operation and instant startup—just ensure you have spare batteries for properties larger than a quarter acre.
The trimmer head design significantly impacts edging quality. Standard single-line heads require multiple passes to achieve clean results, while dual-line heads cut faster with both strings rotating simultaneously. Look for models with pivoting heads that allow you to adjust the cutting angle without changing positions—this feature proves invaluable when transitioning between trimming and precise edging. Adjustable shafts accommodate different heights, preventing the hunched posture that causes back strain during extended edging sessions. Before purchasing, test the weight distribution; a well-balanced trimmer reduces fatigue when holding the precise angles required for professional edging.
Gear Up for Safe, Effective Edging Operations
Flying debris becomes dangerous projectiles when struck by rotating trimmer line, making proper safety equipment non-negotiable. Safety glasses with side shields prevent eye injuries from hidden rocks or concrete fragments, while hearing protection preserves your long-term auditory health against engine noise. Sturdy, closed-toe shoes with ankle support protect your feet from both debris and accidental contact with the cutting line, and long pants made of durable material shield your legs from scratches and flying particles.
Before starting, conduct a thorough equipment inspection. Verify the trimmer line is properly loaded and secured according to manufacturer specifications—loose or improperly installed line causes uneven cutting and dangerous tangles. Examine the cutting guard for cracks or damage, ensuring it deflects debris away from your body. For gas models, confirm there’s sufficient fuel mixed with the proper oil ratio, and let the engine warm up for 30 seconds before beginning. Clear your edging path of large objects, toys, and pets, as even small sticks can become hazardous when struck at high speed.
Execute the Perfect Edging Angle and Movement
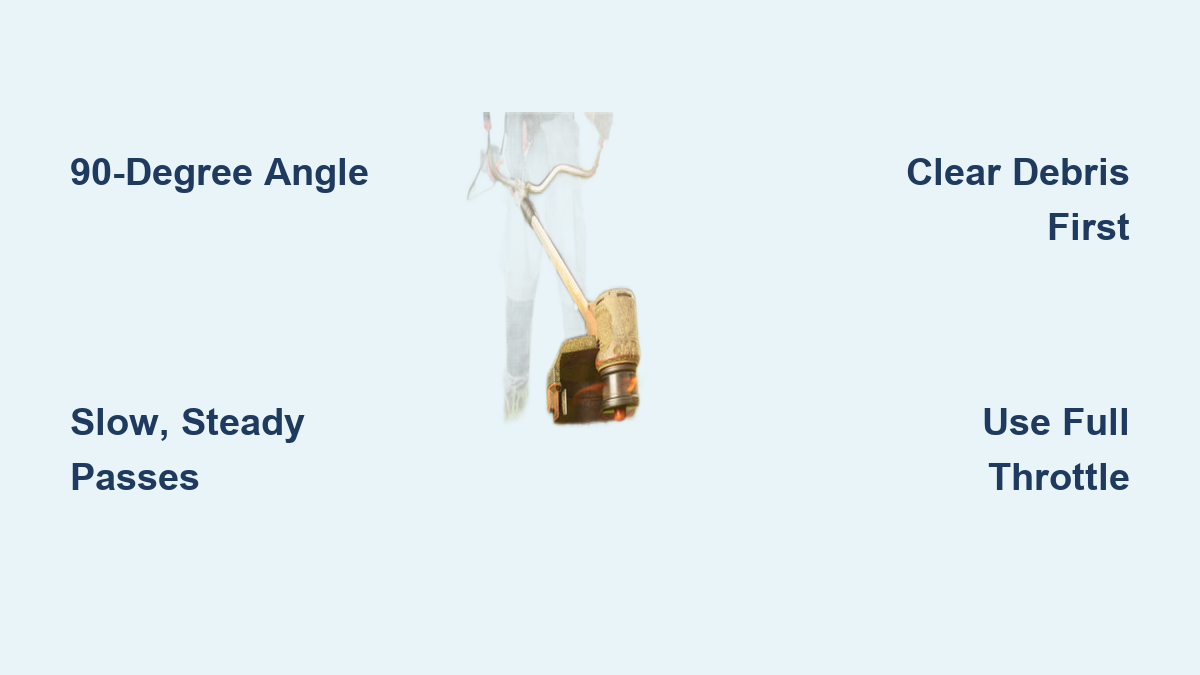
The critical factor separating amateur from professional results is maintaining the proper 90-degree cutting angle against hard surfaces. Tilt the trimmer head so the line cuts vertically downward into the soil-grass junction, creating a clean separation where lawn meets pavement. Grip the handle firmly with both hands, keeping elbows slightly bent to absorb vibration while maintaining precise control. Position yourself parallel to the edge you’re cutting, not perpendicular, which gives you better visibility and control of the cutting line’s position.
Move slowly at a consistent pace—approximately 1 foot per second—letting the rotating line slice through grass rather than forcing it into the soil. Push the trimmer forward just enough for the line to reach the edge definition point, typically where grass meets sidewalk or driveway. For optimal results, overlap each pass by about two inches to prevent uneven cuts and ensure complete coverage. When encountering tough, overgrown edges, make two light passes instead of one aggressive cut, which can scalp the lawn and create an uneven appearance. Periodically pause to sweep away accumulated debris and check your progress, adjusting your angle as needed.
How to Edge Concrete Surfaces Without Damage
When edging along concrete sidewalks and driveways, maintain a consistent depth of one to two inches into the soil to create a defined channel that prevents grass from creeping onto the surface. Avoid letting the line dig too deeply into cracks or joints, which accelerates line wear and produces uneven edges. For newer concrete installations, wait at least 30 days before edging nearby to allow proper curing—fresh concrete can chip when struck by debris.
Mastering Lawn-to-Soil Border Edging
For garden bed edges, hold the trimmer at a steeper angle of 100-110 degrees to slice vertically through the grass root zone. This vertical edging technique creates a clean separation between lawn and planting areas, preventing grass invasion throughout the growing season. When working near delicate plants, use short, controlled bursts rather than continuous operation to avoid accidental damage to nearby foliage.
Establish a Maintenance Schedule for Lasting Results
Consistent maintenance keeps edges looking sharp and prevents the need for intensive restoration work. Edge your lawn every two to three weeks during active growing seasons, adjusting frequency based on rainfall and temperature—warm, wet conditions accelerate grass growth and require more frequent attention. Light trims maintain shape better than infrequent heavy cuts, so establish a regular schedule rather than waiting until edges become overgrown.
When your trimmer line wears down or breaks during operation, reload with fresh line before continuing—dull or damaged line tears grass rather than cutting cleanly, leaving ragged edges that brown and look unhealthy. Keep several pre-wound spools on hand so you never have to interrupt your workflow mid-job. At season’s end, store your trimmer with a full tank of fuel (for gas models) and properly tensioned line, and inspect the head for wear that might require replacement before next spring.
Eliminate Common Edging Errors That Ruin Results
Holding the trimmer at too steep an angle causes the line to dig excessively into soil, creating unnatural trenches that damage shallow plant roots near garden edges. Conversely, tilting too little results in shallow cuts that fill in within days. Practice on a small section first, adjusting your angle until you find the sweet spot for your specific lawn conditions. Always use full throttle when edging—partial throttle reduces cutting efficiency and causes uneven results.
Many beginners push the trimmer too quickly, creating scalloped edges with inconsistent depth and missed spots. Slow, steady movement produces straight, uniform lines. Neglecting to clear debris before working causes dangerous kickback when the line strikes hidden objects, so always survey your path thoroughly. Running the trimmer too close to hard surfaces creates excessive vibration that damages both the tool and your results—maintain a consistent quarter-inch gap between the guard and concrete.
Upgrade to Professional-Grade Edging Techniques
The “tap and turn” method creates crisp corners rather than rounded ones by briefly pausing at transition points. Position the trimmer so the line cuts inward from each direction, meeting at a clean point for sharp 90-degree angles. For curved edges, use a garden hose as a template before cutting, establishing a smooth, consistent arc that guides your movement while maintaining uniform depth.
Creating a beveled edge adds visual interest and helps water drain away from lawn areas. Tilt the trimmer about 15 degrees away from the lawn when cutting, angling the cut so the soil slopes gently downward from grass to pavement. This technique takes practice but produces a professional appearance that distinguishes well-maintained landscapes. For formal gardens, consider installing permanent edging materials like metal or plastic strips, then use your weed eater to maintain the grass line precisely along these guides.
Determine When to Stick With Your Weed Eater
For most residential properties, a quality weed eater with proper technique provides all the edging capability you need. The investment in learning proper technique pays ongoing dividends in lawn appearance while eliminating the storage space and maintenance requirements of additional equipment. By mastering your weed eater’s edging capabilities, you gain a versatile tool that handles trimming, detail work, and edge maintenance with equal skill—truly the workhorse of lawn care equipment. When performed correctly, how to use a weed eater to edge delivers results indistinguishable from dedicated edgers on most residential landscapes.
Final Note: Consistent, proper edging transforms your entire landscape’s appearance with minimal investment. By applying these techniques each time you maintain your lawn, you’ll develop the muscle memory needed for professional results while extending your equipment’s lifespan. Start with small sections to build confidence, then expand to your entire property as your skills improve—soon you’ll wonder why you ever considered purchasing separate edging equipment.
Leave a Reply