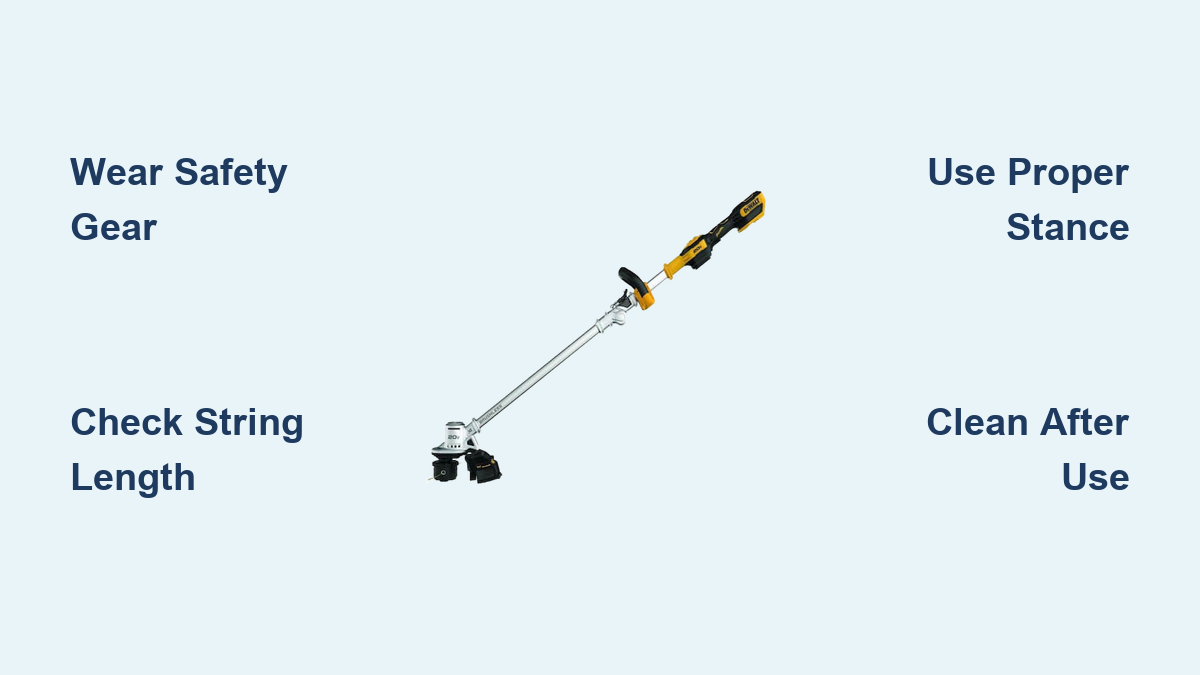
If your DeWalt weed trimmer isn’t performing as expected or you’re unsure how to operate it safely, you’re not alone. Thousands of homeowners struggle with proper string trimmer techniques that maximize efficiency while preventing damage to both the tool and your landscape. Understanding how to use a DeWalt weed trimmer correctly can transform your yard work from frustrating to efficient—saving you time, money, and potential injury. This guide provides step-by-step instructions for proper operation, safety protocols, and maintenance routines that will keep your DeWalt trimmer running smoothly season after season.
Pre-Operation Safety Checks and Preparation
Before you even think about starting your DeWalt weed trimmer, completing these safety checks prevents accidents and equipment damage. Rushing through preparation causes most DIY trimming injuries and is the leading reason for premature tool failure.
Essential Protective Gear Requirements
Always wear these non-negotiable safety items before operating your DeWalt trimmer:
– Safety glasses or face shield (debris causes 70% of trimming injuries)
– Hearing protection (electric models still exceed 85dB)
– Long pants and closed-toe shoes (never operate in sandals)
– Work gloves (reduces vibration fatigue)
Skip any of these at your peril—flying debris has been known to penetrate regular clothing and cause serious lacerations. Keep children and pets at least 50 feet away during operation, as small rocks can become dangerous projectiles.
Pre-Use Inspection Checklist
Run through this 60-second inspection before every use:
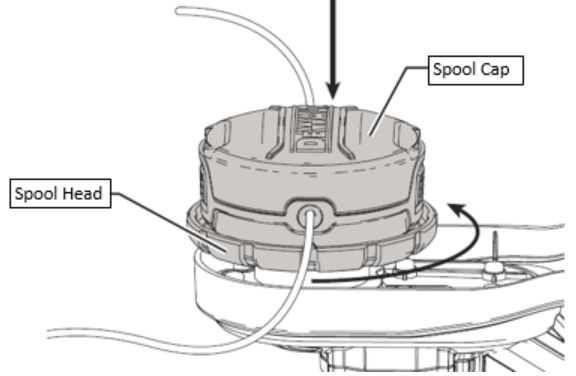
1. Check the cutting head for cracks or damage (replace immediately if compromised)
2. Verify string length (should extend 4-6 inches beyond spool)
3. Inspect power cord for nicks or frays (for corded models)
4. Confirm battery is fully charged and properly seated (for cordless)
5. Ensure all guards are properly installed and undamaged
6. Clear work area of rocks, sticks, and other debris
A damaged cutting head can shatter during operation, sending plastic shrapnel at high velocity. If you notice any component damage, do not operate until replacements are installed.
Proper Starting and Operating Techniques
Knowing how to start and maneuver your DeWalt weed trimmer makes the difference between professional results and frustration. Incorrect technique damages both your landscape and the tool itself.
Starting Your DeWalt Trimmer Correctly
Follow these model-specific startup procedures:
For cordless DeWalt models (DCF520, DCM564):
1. Insert fully charged battery until it clicks securely
2. Press and hold the safety lock button
3. Squeeze the trigger gently to start at low speed
4. Gradually increase speed as needed
For corded DeWalt models (DWE300):
1. Connect to a grounded outdoor outlet
2. Ensure cord is positioned behind you
3. Press safety lock while squeezing trigger
4. Start at lowest speed setting
Never yank the cord or drop the trimmer to disengage—this damages internal components. If your trimmer won’t start, check the circuit breaker or GFCI outlet before assuming equipment failure.
Correct Trimming Stance and Movement
Your body position dramatically affects control and results:
– Stand with feet shoulder-width apart for stability
– Keep the trimmer head tilted slightly toward the work area
– Maintain a 10-15 degree angle between cutting plane and ground
– Move at walking pace (faster causes uneven cuts, slower strains motor)
– Overlap each pass by 50% for consistent results
Critical mistake to avoid: Never operate with the trimmer head directly perpendicular to the ground. This causes excessive vibration, poor cutting, and rapid string wear. The proper angle allows the string tip—not the side—to do the cutting.
Advanced Cutting Techniques for Different Scenarios

Different landscape challenges require specific approaches. Master these techniques to handle any trimming situation with your DeWalt weed trimmer.
Edge Trimming Along Walkways and Driveways
For crisp, professional edges:
1. Reduce speed to 50-70% of maximum
2. Position trimmer vertically against the edge
3. Move slowly while maintaining consistent contact
4. Make multiple light passes rather than one aggressive cut
Pro tip: Use a straightedge or garden hose to mark your cutting line before starting. This prevents accidental over-trimming that creates unsightly gaps.
Clearing Thick Weeds and Overgrowth
When tackling dense vegetation:
1. Start at the perimeter and work inward
2. Use short, controlled bursts rather than continuous operation
3. Clear in sections, allowing the motor to cool between passes
4. Increase speed only when encountering thicker growth
Never force the trimmer through thick weeds—this overheats the motor and causes string breakage. For extremely dense growth, consider using a brush cutter attachment designed for heavy-duty work.
Troubleshooting Common Operational Issues
Even with proper use, problems can occur. These solutions address the most frequent DeWalt trimmer issues encountered by homeowners.
String Keeps Breaking During Operation
If your trimmer line snaps repeatedly:
– Check string diameter: Using incorrect thickness (usually .065-.080″) causes breakage
– Verify cutting height: Hitting hard surfaces shatters string
– Inspect spool: Cracks or deformation cause uneven feeding
– Reduce speed: Excessive RPM wears string rapidly
Replace worn spools immediately—continuing with damaged components risks internal gear damage that requires professional repair.
Trimmer Vibrates Excessively
Excessive vibration indicates serious issues:
– Stop operation immediately
– Check for loose nuts or bolts (especially on the cutting head)
– Inspect for broken or unbalanced string
– Verify no debris is caught in the guard or spool
Continued operation with excessive vibration can cause permanent motor damage and increases fatigue-related accidents. Tighten all fasteners to manufacturer specifications before resuming.
Maintenance Procedures for Longevity
Proper maintenance doubles your DeWalt trimmer’s lifespan and prevents 80% of operational failures. These simple routines keep your tool ready for action.
Daily Post-Use Cleaning Routine
After every use:
1. Wipe down the entire unit with a damp cloth
2. Remove debris from air vents and cooling fins
3. Check and clean the debris shield
4. Inspect string for uneven wear
5. Store in a dry location away from direct sunlight
Critical step: Never hose down your trimmer—water damages electrical components. Use a soft brush for stubborn debris.
Monthly Deep Maintenance Tasks
Perform these every 25 hours of operation:
– Lubricate any moving parts per manufacturer instructions
– Check and tighten all fasteners
– Inspect power cord for internal damage (corded models)
– Test battery contacts for corrosion (cordless models)
– Replace worn string spools before they fail
A well-maintained DeWalt trimmer typically lasts 5-7 years with regular use. Neglected tools often fail within 1-2 seasons.
Battery Care for Cordless DeWalt Models
Cordless DeWalt trimmers dominate the market, but improper battery handling causes premature failure.
Maximizing Battery Life
Follow these battery best practices:
– Store at room temperature (extreme cold reduces capacity)
– Charge before complete discharge (lithium-ion prefers partial cycles)
– Remove battery when not in use for extended periods
– Clean contacts monthly with isopropyl alcohol
– Never leave on charger after reaching full capacity
A DeWalt 20V battery properly maintained can deliver 3-5 years of reliable service. Mishandled batteries often fail within 12-18 months.
When to Seek Professional Service
Some issues require professional attention. Contact DeWalt service if:
– Motor makes grinding or unusual noises
– Trigger doesn’t respond consistently
– Battery doesn’t hold charge after multiple cycles
– Visible damage to housing or internal components
– Recurring string feeding problems after basic troubleshooting
Attempting DIY repairs on electrical components voids your warranty and creates serious safety hazards. DeWalt offers three-year limited warranties on most trimmer models when registered.
Final Note: Mastering how to use a DeWalt weed trimmer properly transforms yard maintenance from a chore to an efficient task. By following these safety protocols, operating techniques, and maintenance routines, you’ll achieve professional results while extending your tool’s lifespan. Remember that consistent, proper technique prevents most common problems—take time to learn correct methods rather than forcing results. For model-specific details, always consult your DeWalt owner’s manual as features vary between corded and cordless models. With proper care, your DeWalt trimmer will deliver reliable performance season after season.
Leave a Reply