
A well-maintained gas weed trimmer transforms frustrating yard work into a breeze, effortlessly slicing through overgrown grass, stubborn weeds, and unruly landscape edges. Yet too many homeowners wait until their trimmer sputters, refuses to start, or loses power mid-job before addressing maintenance needs. Learning how to tune up a gas weed trimmer properly takes less than an hour and costs only a few dollars in replacement parts—but this simple routine can extend your equipment’s lifespan by years while preventing costly repairs or premature replacement.
Regular tune-ups keep your trimmer running efficiently, reduce harmful emissions, and deliver cleaner cuts that promote healthier lawn edges. Whether you’re preparing for spring yard work or reviving a trimmer that’s been dormant in the garage all winter, this guide walks you through every critical step of a complete tune-up. By following these procedures, you’ll diagnose common issues, replace worn components, and establish a maintenance routine that keeps your trimmer performing like new season after season—saving you time, money, and frustration when you need it most.
Gather Essential Tune-Up Supplies Before Starting
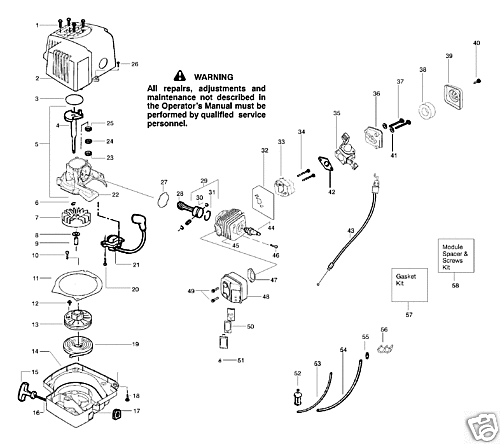
Before you begin the actual tune-up process, collect all necessary materials and tools in one organized workspace. Having everything within arm’s reach prevents mid-procedure interruptions and ensures you complete the maintenance efficiently without damaging components.
Replacement parts you absolutely need include: a fresh spark plug (always verify the correct model number in your owner’s manual—common types include Champion RCJ8Y or NGK BPMR7A), a new air filter (paper or foam depending on your specific trimmer model), and fuel stabilizer if your equipment sits unused for extended periods. Many older trimmers also require new fuel lines, especially if the existing rubber hoses show visible cracks, stiffness, or discoloration from ethanol exposure.
Essential tools for the job: a complete screwdriver set (both Phillips and flathead varieties), a 5/8-inch spark plug socket with ratchet, needle-nose pliers for stubborn connections, several clean microfiber rags for wiping debris, and a small stiff-bristle brush for removing built-up carbon. Important safety note: Always wear work gloves to protect your hands from sharp edges and accumulated grime, and work in a well-ventilated area to prevent dangerous fume accumulation when handling fuel components.
Time estimate: Most complete gas weed trimmer tune-ups take 30 to 45 minutes for experienced users, or up to one hour for first-timers working carefully. Schedule your maintenance during daylight hours when visibility is best, and never attempt tune-up procedures when rushed or fatigued.
Replace the Spark Plug for Reliable Ignition

The spark plug ignites the fuel-air mixture in your trimmer’s combustion chamber, and a worn or fouled plug causes hard starting, rough idling, and significant power loss. Replacing this inexpensive component often resolves performance issues that mistakenly seem like major engine problems.
Locate and remove the old spark plug: First, disconnect the spark plug wire by firmly gripping the rubber boot—not the wire itself—and pulling straight off. Use your spark plug socket to loosen the old plug by turning counterclockwise. Once loose, remove it completely and inspect the ceramic insulator and electrode. Critical warning signs include thick black carbon buildup, oily residue (indicating internal engine problems), or a visibly damaged or eroded electrode—all definite indicators that replacement is necessary.
Install the new spark plug correctly: Before installation, check the new plug’s gap using a dedicated gap gauge; most trimmer plugs require a precise gap of 0.020 to 0.025 inches. Carefully thread the new plug in by hand first to avoid cross-threading the cylinder head, then tighten with your socket to the manufacturer’s specified torque (typically 10-15 ft-lbs). Never over-tighten—this can strip expensive cylinder head threads. Finally, reconnect the spark plug wire firmly until you hear or feel it click securely into place.
Pro maintenance tip: Keep a spare spark plug in your garage toolkit. When performance issues arise mid-season, swapping the plug takes only minutes and immediately rules out ignition problems as the cause—potentially saving you a service call.
Clean or Replace the Air Filter for Proper Airflow
A clogged air filter restricts vital airflow to the engine, causing it to run rich (excess fuel, insufficient air). This condition leads directly to fouled spark plugs, decreased cutting power, and significantly increased fuel consumption. Clean or replace the air filter during every tune-up—or more frequently if you operate in dusty conditions or near construction sites.
Access the air filter housing properly: Most trimmer models feature a removable cover on the engine’s side, secured with one or two easily accessible screws. Remove these screws and set them aside in a container where they won’t roll away. Carefully lift off the cover and remove the filter element for inspection. Look for telltale signs like excessive dirt accumulation, oil saturation, or physical damage to the filter media.
Clean or replace based on actual condition: Foam filters can often be rejuvenated by washing in warm soapy water, thorough rinsing, and complete air drying before reinstalling. Paper filters should always be replaced rather than cleaned, as washing destroys the delicate fibers designed to trap fine particles. Critical rule: If the filter appears torn, saturated with oil beyond normal lubrication, or clogged with debris that won’t shake out, replace it immediately regardless of filter type.
Reinstall with precision: Ensure the filter seats flush against any sealing surfaces and check that no gaps exist between the filter edge and housing. A improperly seated filter allows unfiltered air into the engine, accelerating wear on internal components like pistons and cylinders—potentially causing catastrophic engine failure.
Inspect and Replace Degraded Fuel Lines
Fuel lines deteriorate over time due to exposure to ethanol-blended fuels and natural aging of rubber compounds. Cracked, brittle, or swollen fuel lines cause dangerous leaks, hard starting, and inconsistent performance. This often-overlooked step prevents frustrating mid-job failures and potential fire hazards.
Locate all fuel lines systematically: Gas trimmers typically have two primary fuel lines—one running from the tank to the carburetor (feed line) and another serving as a return line. Trace each line carefully along its entire path, noting connection points. Professional tip: Take multiple photos with your smartphone before disconnecting anything—these serve as invaluable references during reassembly.
Check condition thoroughly and replace when necessary: Squeeze the lines gently along their entire length. Any sections that feel hard, stiff, brittle, or sticky require immediate replacement. Also inspect for visible cracks, swelling, or leaks at connection points. Critical safety note: When replacing fuel lines, use only fuel-resistant tubing specifically rated for small engine use—standard aquarium tubing or generic vinyl tubing deteriorates rapidly when exposed to modern ethanol-blended gasoline.
Install new fuel lines with care: Measure and cut new lines to match the original length precisely. Slide the new tubing securely onto the fuel tank nipple and carburetor fittings, using appropriate clamps if your model requires them. Verify all connections are secure but not so tight that they pinch or restrict fuel flow—proper fuel delivery is essential for optimal performance.
Drain Old Fuel and Add Fresh Mixture for Reliable Starts
Stale fuel causes more starting problems than almost any other single issue. Gasoline begins degrading within 30 days of refinement, and ethanol-blended fuels attract moisture that creates gum and varnish deposits in the carburetor. At every tune-up, properly address the fuel system to prevent frustrating failures.
Drain the existing fuel safely: If your trimmer has a fuel drain screw or priming bulb, use these features to remove old fuel into an EPA-approved container. If not, carefully tip the trimmer to pour fuel from the tank into a gas-safe container. Never drain fuel indoors or near ignition sources, and always work in a well-ventilated area. Dispose of old fuel according to local regulations—many communities accept it at designated hazardous waste collection sites.
Add fresh fuel mixture correctly: Use only fresh gasoline with the exact oil-to-gas ratio specified for your trimmer model. Most two-cycle trimmers require a precise 50:1 ratio (2.6 ounces of two-cycle oil per gallon of gasoline), but consult your owner’s manual to confirm—using the wrong ratio damages engines. If you prefer premixed fuel, choose a premium brand specifically formulated for outdoor power equipment with low ethanol content.
Add fuel stabilizer for extended storage: If the trimmer will sit unused for more than three weeks, add the recommended amount of fuel stabilizer to fresh fuel before filling the tank. Quality stabilizers prevent fuel breakdown and gum formation, making spring start-up significantly easier and protecting your carburetor from expensive clogs.
Clean the Carburetor Jets for Smooth Operation
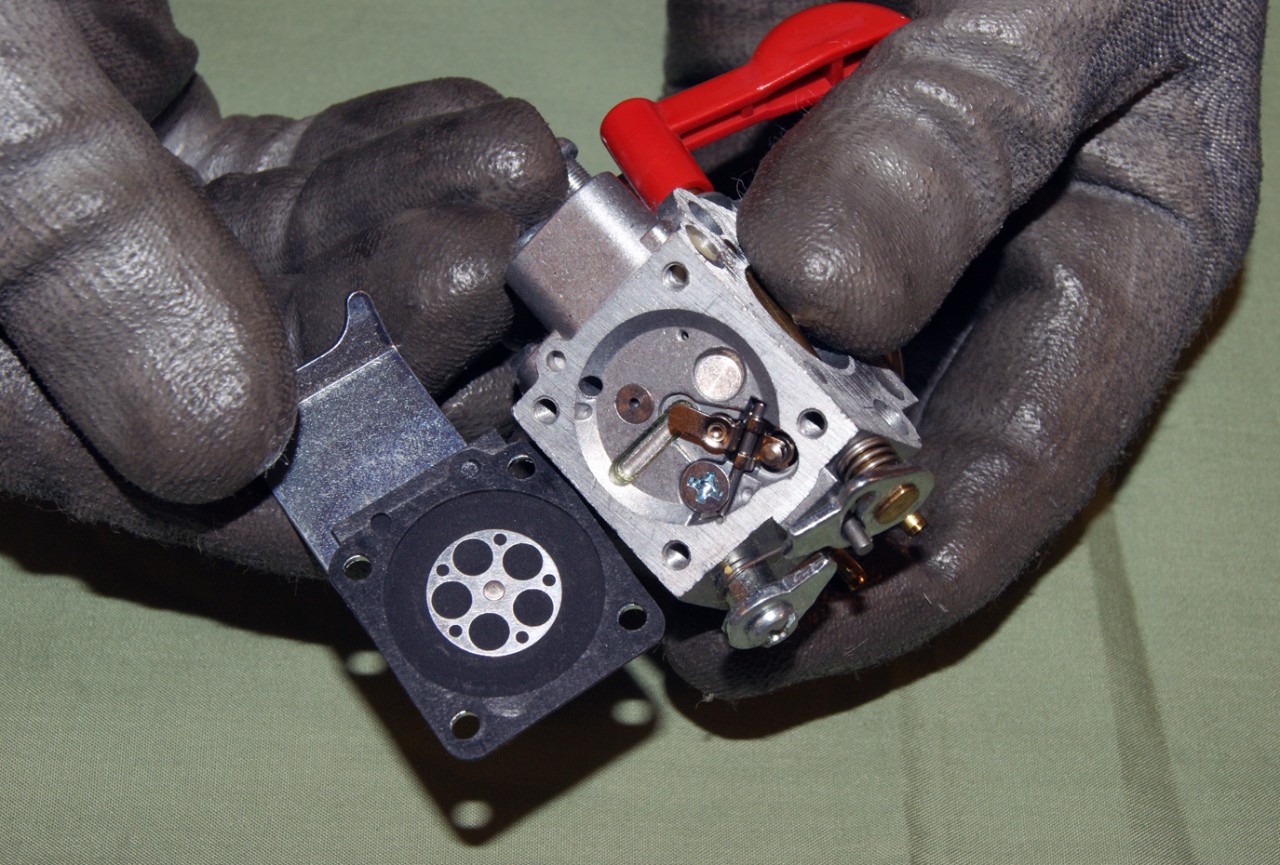
The carburetor precisely meters fuel and air into the engine for combustion, and clogged jets cause poor performance often mistaken for major engine problems. While a complete carburetor overhaul exceeds basic tune-up scope, cleaning accessible components restores proper operation in most cases.
Access the carburetor safely: Remove the air filter housing to expose the carburetor body. Locate the idle mixture screws (typically small brass screws marked “L” for low-speed and “H” for high-speed) and the main jet access point. Have your owner’s manual ready for reference—adjusting these screws incorrectly can cause serious performance issues.
Clean accessible passages effectively: Use compressed air to blow through jets and passages from the outside in—never insert metal objects that could damage delicate components. Spray a small amount of carburetor cleaner onto a clean rag and wipe external surfaces to remove accumulated grime. If your carburetor has a removable bowl, take it off to clean any sediment, being extremely careful not to disturb the float assembly or damage gaskets.
Test for proper operation after cleaning: After reassembly, perform a thorough leak check by pressurizing the fuel system (some models have a primer bulb for this purpose). Watch carefully for bubbles in fuel lines or drips at connections. Start the trimmer and allow it to warm up completely, noting whether it idles smoothly and responds quickly to throttle changes—these indicate successful carburetor cleaning.
Establish a Simple Maintenance Schedule for Longevity
Consistent maintenance prevents most tune-up scenarios and keeps your trimmer running optimally throughout the season. Developing a straightforward routine takes the guesswork out of equipment care and saves you time and money long-term.
Before each use: Perform a quick 60-second inspection checking for fuel leaks, loose components, and damaged guards. Ensure the cutting line is properly loaded and the air filter is clean enough for operation. This simple habit prevents 80% of common field failures.
During the season: Every 25 to 30 hours of operation (roughly every 4-6 mowing sessions), check the air filter and clean or replace as needed. Inspect the spark plug condition and replace if fouled. Verify fuel line integrity and address any issues before they cause failures in the field.
End of season: Add fuel stabilizer to a full tank and run the engine for 5 minutes to circulate it through the system. Remove and clean the spark plug, applying a light coat of oil to the cylinder threads before reinstalling. Store the trimmer in a clean, dry location away from extreme temperatures and moisture.
Annual tune-up ritual: At the start of each spring, perform the complete procedure outlined in this guide—new spark plug, fresh stabilized fuel, clean air filter, and inspected fuel lines. This simple ritual ensures reliable starting and peak performance when you need it most, turning potential frustration into seamless yard maintenance.
A properly tuned gas weed trimmer starts easily on the first or second pull, runs smoothly without hesitation, and handles tough vegetation without stalling or losing power. The hour you invest in seasonal maintenance pays substantial dividends in reliable performance and extended equipment life. By following these tune-up steps and establishing consistent maintenance habits, your trimmer will be ready whenever the lawn needs attention—year after year—saving you time, money, and frustration while keeping your property looking professionally maintained.
Leave a Reply