Ever find yourself halfway through trimming your lawn when your Husqvarna weedeater suddenly runs out of line? You’re not alone—thousands of homeowners face this frustrating interruption each season. Knowing how to string a Husqvarna weedeater properly means the difference between wasting money on professional maintenance or getting back to work in minutes. The good news is that with Husqvarna’s various trimmer head systems, reloading your line doesn’t have to be complicated. Whether you own a battery-powered model or a gas trimmer, this guide delivers the exact steps you need to reload your line successfully.
Husqvarna trimmers use several distinct line replacement systems, each requiring specific techniques for optimal performance. Getting the procedure wrong can lead to frustrating line jams, uneven cutting, or even damage to your equipment. This comprehensive guide covers every major Husqvarna trimmer head system so you can confidently reload your line regardless of your model. You’ll learn not just how to string a Husqvarna weedeater, but how to do it correctly the first time—saving you time, money, and frustration throughout the mowing season.
Essential Safety Steps Before Stringing Your Husqvarna
Always remove the battery before attempting to string your Husqvarna weedeater—this critical step prevents accidental activation that could cause serious injury. Even with battery-powered models, residual energy could potentially trigger the mechanism if you skip this precaution. For gas-powered trimmers, ensure the engine is completely off and cool to the touch before beginning any maintenance. Working on hot equipment risks burns and increases the chance of damaging heat-sensitive plastic components during disassembly.
Set up your workspace on a clean, flat surface with adequate lighting so you can clearly see alignment indicators and threading holes. Keep small parts organized in a container to prevent loss, and have your replacement line ready before starting the process. Never attempt to replace trimmer line while the equipment is leaning against walls or objects that could shift during the procedure. Taking these safety measures seriously transforms what could be a dangerous task into a simple, routine maintenance procedure.
Why Battery Removal Is Non-Negotiable
Many users skip battery removal because they’re in a hurry to finish yard work, but this dangerous shortcut puts your fingers at serious risk. The cutting head can rotate at high speeds with minimal trigger pressure, and even a momentary accidental activation while your hands are near the head could cause severe lacerations. Treat every trimmer head maintenance session with the same caution you would use when changing a lawnmower blade—your safety depends on it.
A15B Spool Replacement: Step-by-Step Guide

The A15B system is Husqvarna’s standard spool replacement method found on multiple trimmer models. Unlike simpler systems, this requires complete access to the internal spool housing but ensures reliable line feeding when done correctly.
How to Remove the Trimmer Head Lid
Press both lock mechanisms simultaneously on either side of the trimmer head lid—these dual locks prevent accidental detachment during operation. While maintaining pressure on both locks, carefully lift the lid straight up and away from the assembly. If the lid resists removal, check that you’re fully depressing both locks before applying upward pressure. Forcing the lid can damage the locking mechanism, requiring expensive replacement parts.
Installing the New Pre-Loaded Spool
Place your new pre-loaded spool into the housing, ensuring it sits flush against the internal surfaces. Rotate the spool until the emerging trimmer line aligns with the designated slots—this precise alignment prevents binding during operation. Pull both line ends through the slots, extending equal lengths on either side (typically 6-8 inches). Uneven line lengths cause vibration issues and premature line breakage during use.
Final Assembly Checkpoints
Return the lid to its position, pressing firmly until both locks click securely. Test the assembly by gently tugging on the lid to confirm it won’t detach during operation. Push the side button to extend the line toward the guard knife—the line should contact the knife at approximately 1-2 inches from the tip for optimal cutting performance. If the line doesn’t extend properly, disassemble and check your spool alignment before trying again.
R25B Line Loading: Streamlined Replacement Method
The R25B system eliminates complete disassembly, making it faster and less messy than traditional spool replacement methods. This efficient approach works by threading new line directly into the head without removing the internal spool.
Correct Line Length and Alignment
Cut exactly two meters of replacement line—this specific length prevents tangling while ensuring sufficient material for proper winding. Locate the alignment arrows on both the knob and housing; these must match precisely for correct line deployment. Misaligned arrows cause feeding problems and uneven line wear during operation. Hold the trimmer head steady while aligning these markers to avoid accidental rotation during the loading process.
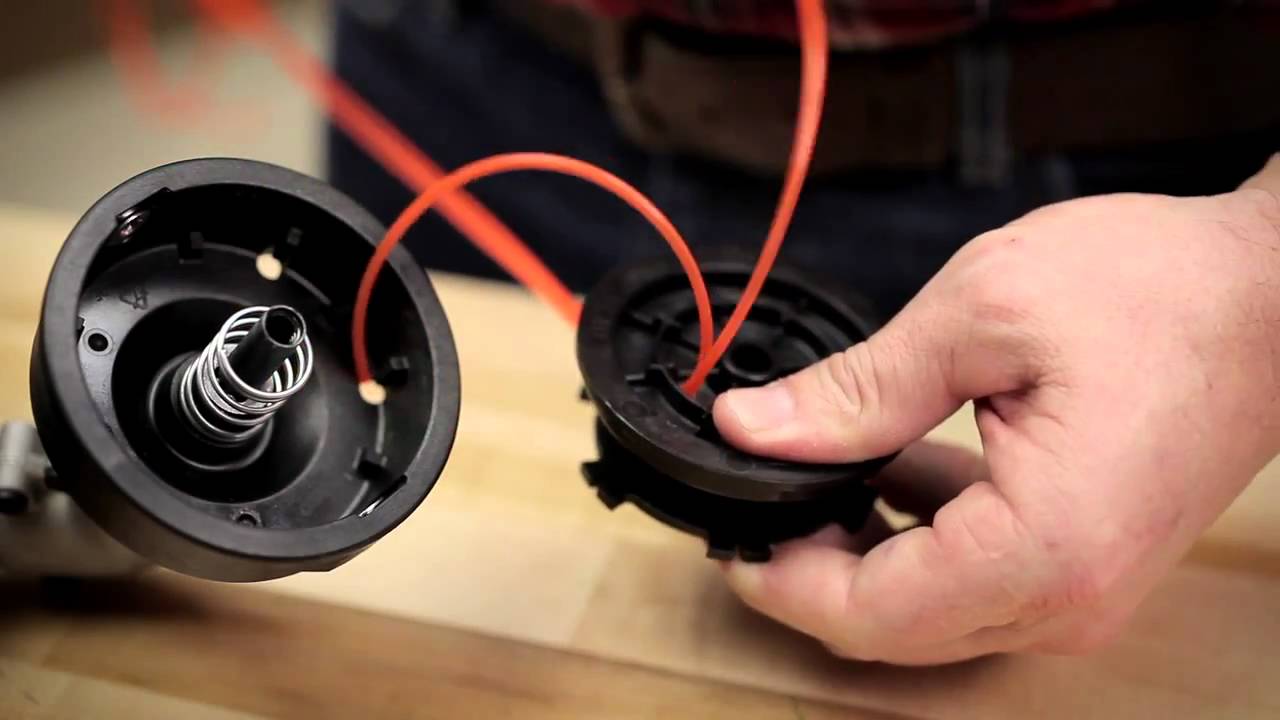
Feeding and Winding Technique
Insert the line into the designated hole, feeding it through until both ends emerge equally from opposite sides. Begin rotating the head clockwise to wind the line inward—this specific direction is critical for proper deployment. Continue winding until the extended line reaches the distance to the guard knife (typically 6-8 inches). The clockwise winding direction follows the natural rotation of the head during operation, preventing tangles and ensuring smooth line advancement.
Rapid Replace System: Three-Minute Line Change
Husqvarna’s Rapid Replace™ system delivers the fastest line replacement method in their lineup, designed specifically for users who want minimal downtime between maintenance tasks.
Alignment Is Everything
Locate the indicator marks on your Rapid Replace head and align them precisely according to your operator’s manual. This initial alignment determines whether the line feeds correctly during operation. Many users skip this step and wonder why their line won’t advance properly—the alignment marks exist for a critical reason. Take the extra five seconds to get this right and save yourself multiple frustrating attempts later.
Feeding and Securing the Line
Insert the line until it catches on the internal anchor point, ensuring both ends extend equally. The final step requires twisting the mechanism to secure and tension the line—this action locks everything in place for reliable operation. The entire Rapid Replace process should take less than two minutes once you’ve mastered the technique, making it ideal for professionals who need quick turnarounds between jobs.
Battery Trimmer Line Winding: Custom Loading Method
Battery-powered Husqvarna trimmers often use a manual winding method that gives you more control over line placement and tension. This general procedure applies to multiple battery trimmer models.
Winding Best Practices
Hook the line at the designated anchor point and wind it around the internal spool following the directional arrows printed on the housing. Maintain consistent tension throughout winding—too loose causes tangles, while too tight creates binding issues. The ideal winding pattern creates neat, concentric circles without overlapping or crossing the line. Stop winding when you reach the fill line indicator or when approximately 6 inches of line remain for threading through the slots.
Common Winding Mistakes to Avoid
Most line feeding problems stem from improper winding technique. Never force the line into tight spaces or create “hot spots” of concentrated line—these cause uneven feeding and premature line breakage. Avoid winding against the directional arrows, as this reverses the natural line deployment during operation. If your line constantly jams after reloading, check your winding pattern before assuming equipment failure.
Select the Perfect Trimmer Line for Your Husqvarna

Choosing the right line type significantly impacts cutting performance and equipment longevity. Husqvarna offers multiple line profiles, each designed for specific vegetation types.
Round vs. Twisted vs. Serrated Line
Round line provides reliable general-purpose cutting for standard lawn maintenance. Twisted line reduces operating noise while improving cutting efficiency for lighter vegetation—ideal for noise-sensitive neighborhoods. Serrated or square-edged line delivers aggressive cutting performance for dense weeds and light brush that would clog standard line. Match your line diameter precisely to your trimmer’s specifications—using line that’s too thick strains the drive system, while undersized line wears quickly.
Prevent Common Line Problems With Proper Maintenance
Regular inspection prevents most feeding issues before they interrupt your work. After each use, clear grass and debris from the trimmer head area, especially around line slots and rotation mechanisms. Built-up material interferes with line advancement and causes premature wear.
Check your trimmer guard knife monthly for wear or damage—this small blade trims your line to optimal length during operation. A dull or damaged knife prevents proper automatic advancement, requiring manual line extension that reduces efficiency. Store your trimmer with the battery removed and the head protected from direct sunlight to extend component life.
By following these precise methods for how to string a Husqvarna weedeater, you’ll experience fewer line feeding problems and enjoy more consistent cutting performance throughout the season. The key is matching your technique to your specific trimmer head system—once you’ve mastered the correct procedure for your model, reloading trimmer line becomes a quick, routine task rather than a frustrating interruption to your yard work. Remember that proper line selection and regular maintenance prevent most common issues, keeping your Husqvarna weedeater ready for action whenever you need it.
Leave a Reply