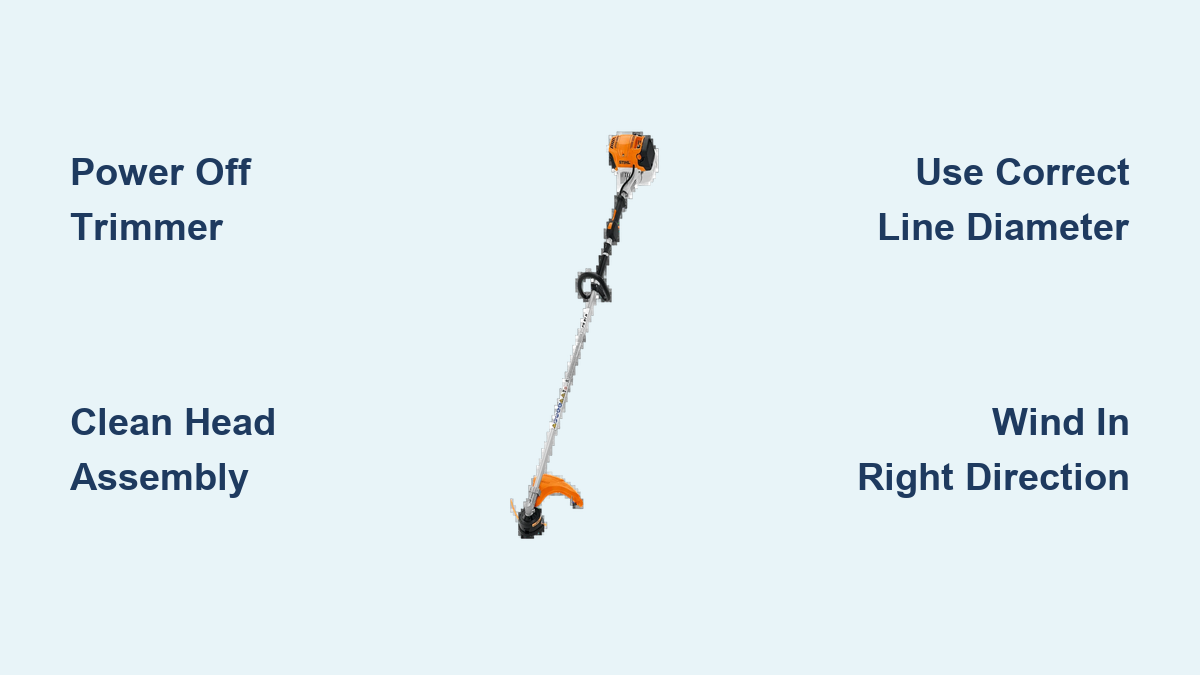
When your STIHL weed trimmer’s line snaps during a critical edge-cutting job, knowing how to restring it quickly becomes essential. A worn or broken cutting line forces you to make multiple passes over the same areas, leaving your lawn looking uneven and unprofessional. Properly restrung trimmer line delivers clean, precise cuts along fence lines, around trees, and along driveways with minimal effort. This practical guide walks you through the exact process of restringing any STIHL trimmer head model, ensuring you can restore your equipment’s cutting performance in under 15 minutes—without damaging internal components or compromising safety.
Using incorrect line or improper installation techniques can strain your STIHL trimmer’s engine, damage the head mechanism, and create dangerous operating conditions. By following the manufacturer’s specifications for your specific head model, you’ll maintain optimal cutting power while extending your equipment’s lifespan. Whether you’re maintaining a residential yard or tackling professional landscaping projects, mastering this fundamental maintenance procedure saves you time and money on service calls. This guide covers everything from safety preparation to troubleshooting common line advancement issues, giving you the confidence to handle this essential task correctly every time.
Power Off and Complete Safety Protocol Before Restringing
Before touching any part of your STIHL weed trimmer for maintenance, implementing a complete safety shutdown is non-negotiable. An accidental engine start during the restringing process could cause serious injury from moving parts or the rotating cutting line. Begin by turning off the engine completely and removing the ignition key if your model has one. For gas-powered trimmers, disconnect the spark plug wire by pulling the boot straight off to prevent accidental ignition during maintenance.
Why Engine Cooling Time Matters for Safe Restringing
Allow your STIHL trimmer to cool for at least 15 minutes if it was recently operated. Hot components can cause burns and may affect the new trimmer line’s integrity during installation. The metal housing around the trimmer head often retains heat longer than you might expect, making it uncomfortable to handle and potentially causing you to drop components. Working with cooled equipment ensures you can handle all parts safely and focus on proper line installation rather than avoiding burns.
Essential Safety Gear for Trimmer Restringing
Wear work gloves to protect your hands from sharp edges on the trimmer head components and friction from handling nylon line. Safety glasses prevent debris from entering your eyes during the cleaning process. Having these basic safety items on hand creates a secure working environment and prevents minor accidents that could sideline your yard work. Never skip this step—even experienced users can suffer injuries when working with unfamiliar head models or after rushing the process.
Clean Your Trimmer Head Before Installing New Line
A dirty trimmer head creates multiple problems during the restringing process: debris interferes with proper line seating, obstructs advancement mechanisms, and makes it difficult to see critical components. Before removing old line, take 2-3 minutes to thoroughly clean the head assembly using the right tools.
Step-by-Step Trimmer Head Cleaning Process
- Use a soft-bristled brush to remove loose grass and dirt from the exterior head housing
- Direct compressed air through the line eyelets and around the bump mechanism
- For stubborn debris, use a damp cloth (never spray liquid directly on components)
- Inspect all parts for cracks, excessive wear, or damage while cleaning
- Allow all components to dry completely before proceeding
This cleaning process reveals hidden problems like worn eyelets or damaged internal components that could cause issues with new line installation. Many users skip this critical step only to discover later that debris was blocking proper line advancement, forcing them to repeat the entire process.
Select the Exact STIHL Trimmer Line for Your Head Model

Not all STIHL trimmer line works with every head model—using incompatible line causes performance issues, excessive line consumption, and potential head damage. The line diameter typically ranges from 1.6mm for light residential use to 3.0mm or larger for professional applications tackling thick weeds.
How to Match Line to Your Specific Application
For standard residential trimming around flower beds and fence lines where vegetation is primarily grass: Use STIHL’s standard round line in 1.6mm-2.0mm diameter. This line provides sufficient cutting power without excessive engine strain on lighter-duty trimmers.
For professional landscaping or heavy-duty applications with thick weeds and woody vegetation: Choose STIHL’s professional-grade line in 2.4mm-3.0mm diameter with twisted or serrated profiles. These lines maintain cutting edges longer and resist fragmentation when encountering dense vegetation.
Critical Line Compatibility Verification Steps
- Locate your trimmer head model number (typically stamped on the housing)
- Cross-reference with the STIHL trimmer line chart for approved line types
- Check the head instruction card for specific diameter requirements
- Verify line shape compatibility (round, twisted, or serrated)
- Confirm maximum line length specifications for proper loading
Using line that doesn’t match your head’s specifications is the #1 cause of restringing failures. When in doubt, consult STIHL’s digital documentation rather than guessing—this small effort prevents hours of frustration.
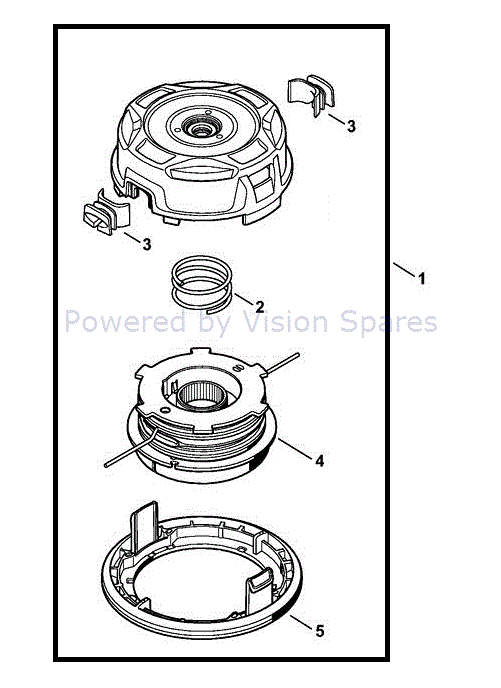
Restring AutoCut Heads: Bump-Feed System Installation
The AutoCut head is STIHL’s most common bump-feed design, featuring dual line advancement triggered by tapping the head against the ground. Proper installation requires specific winding direction and line length to ensure reliable advancement.
AutoCut Restringing Step-by-Step Procedure
- Remove the retaining cap by turning counterclockwise (note the direction arrows)
- Take out the spool assembly and discard all old line remnants
- Insert two equal-length lines through opposing eyelets on the spool
- Wind both lines in the direction indicated by arrows (typically clockwise)
- Leave 6 inches of line extending from each side before reassembly
- Reinstall the spool, ensuring lines feed through the eyelets properly
- Secure the retaining cap without over-tightening
The winding direction is critical—reversing it causes lines to retract instead of advancing during use. Most AutoCut failures occur because users wind the line in the wrong direction or use unequal line lengths that create imbalance during operation.
Restring AutoCut C EasySpool Heads: Simplified Loading Method
The AutoCut C with EasySpool technology eliminates traditional knot-tying and simplifies the line loading process. This design features a special locking mechanism that secures the line without complex threading.
EasySpool Installation Without Common Mistakes
- Rotate the head cap counterclockwise to access the spool
- Insert the line end into the designated slot on the spool
- Wind the line following the direction arrows molded into the housing
- Leave approximately 5-6 inches of line extending from each side
- Snap the cap back into place until it clicks securely
The key to success with EasySpool heads is ensuring the line locks properly in the retention slot before winding. Many users experience advancement issues because they fail to engage this mechanism correctly, causing the line to slip during operation.
FixCut and TrimCut Head Restringing Techniques
The FixCut head uses pre-measured line segments that insert directly into the head, eliminating spool winding entirely. The professional-grade TrimCut head requires heavier line and precise tensioning for demanding commercial applications.
FixCut Installation for Quick Line Replacement
- Remove the head cover according to the instruction card
- Insert pre-cut line segments into the designated channels
- Ensure lines extend equal lengths from both sides (typically 5-6 inches)
- Replace the cover and secure according to specifications
TrimCut Professional Head Loading Process
- Disassemble the head following model-specific instructions
- Load heavy-duty line (2.7mm-3.0mm) through the eyelets
- Wind with moderate tension—too loose causes tangling, too tight restricts advancement
- Maintain consistent line length on both sides for balanced operation
- Reassemble with proper torque on all components
Professional heads require more precise line tensioning than residential models. When properly loaded, TrimCut heads deliver consistent performance through extended commercial use without frequent line replacement.
Troubleshoot Line Advancement Problems Immediately
Even with correct installation, line advancement issues occasionally occur. Identifying and resolving these problems quickly prevents frustration during yard work and protects your equipment from unnecessary strain.
Why Your Line Won’t Advance During Operation
- Incorrect line diameter: Too thick for head mechanism or too thin to engage advancement
- Wrong winding direction: Line retracts instead of advancing when bumped
- Debris obstruction: Grass or dirt blocking the bump mechanism
- Unequal line lengths: One side advances while the other retracts
To fix advancement issues, first verify your line specifications match the head requirements, then check installation against the instruction card diagrams. Most problems resolve with minor adjustments to line length or winding direction.
Preventing Excessive Line Breakage During Use
Frequent line breakage typically indicates:
– Using light-duty line for thick vegetation
– Hitting hard surfaces (rocks, fences, walls)
– Line diameter too small for the application
– Damaged head eyelets creating stress points
Increase line diameter for tough jobs, maintain proper cutting technique (45-degree angle), and replace worn head components to dramatically reduce breakage.
Maintain Optimal Line Performance Through Proper Storage
After successfully restringing your STIHL weed trimmer, proper storage preserves line condition and extends its useful life. UV exposure makes line brittle, while moisture causes degradation and poor performance.
Storage Best Practices for Longest Line Life
- Store trimmer with head elevated off ground surfaces
- Keep in a cool, dry location away from direct sunlight
- Cover the head assembly to prevent dust accumulation
- Never store with line under tension in the head
- Inspect line condition before each use
By following these specific guidelines for how to restring a STIHL weed trimmer correctly, you’ll maintain optimal cutting performance throughout the season. The combination of manufacturer resources—including the STIHL trimmer line chart, head instruction cards, and digital documentation—provides comprehensive guidance for owners of all experience levels. Respecting the compatibility requirements specific to each trimmer head model ensures safe, effective operation and extends the service life of your STIHL equipment. With proper line selection, correct installation techniques, and regular maintenance, your weed trimmer will deliver reliable performance season after season.
Leave a Reply