Nothing halts your lawn care routine faster than a weed trimmer that suddenly runs out of line mid-job. When your Husqvarna trimmer stops feeding line while you’re battling overgrown edges, knowing how to restring a Husqvarna weed trimmer becomes your most valuable skill. Whether you’re dealing with a tangled mess inside the head or simply ran out of line during a large job, the right reloading technique saves you from costly service calls and gets you back to work in minutes. This guide covers every Husqvarna trimmer head system currently in production, so you can identify yours and complete the reload correctly the first time—without the frustration of mismatched instructions.
Husqvarna designs their trimmer heads around four distinct reload systems, each requiring specific techniques. Using the wrong approach for your model leads to tangles, poor performance, or even damage to your equipment. Before reaching for that spool of line, take 30 seconds to identify your system—the difference between a smooth reload and hours of frustration starts with this critical first step. The following sections break down each system with precise instructions, common pitfalls to avoid, and professional tips that make restringing faster and more reliable.
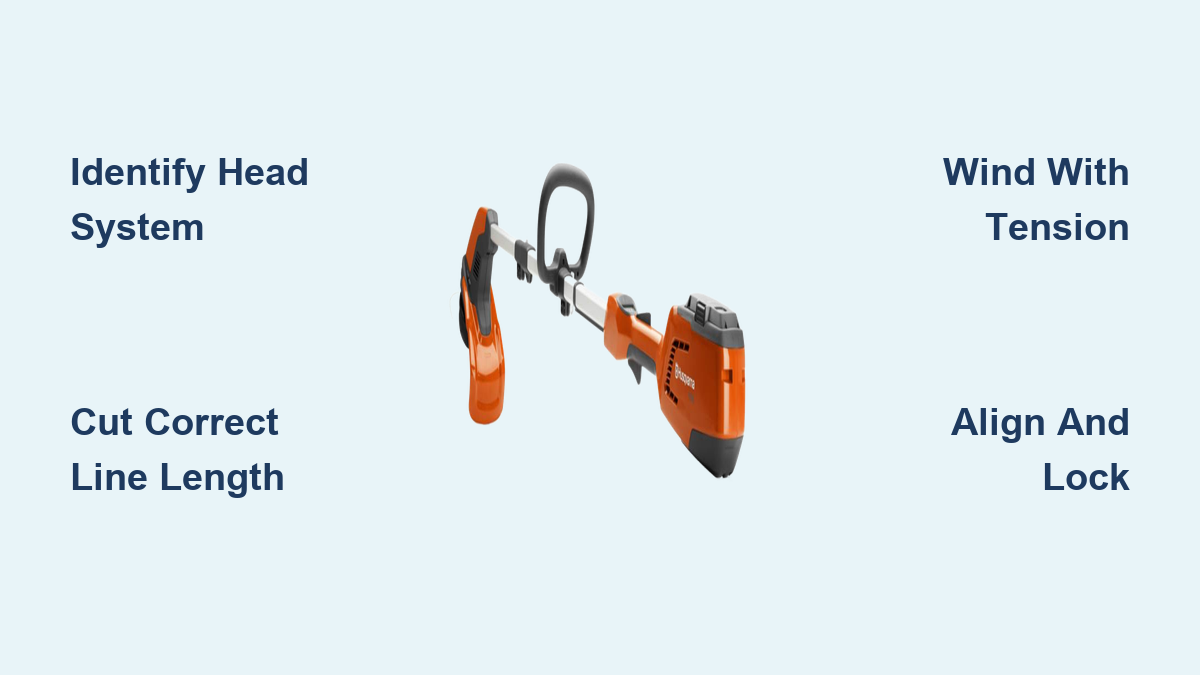
Identify Your Husqvarna Trimmer Head in 60 Seconds

Don’t waste time attempting reload methods that don’t match your equipment—your Husqvarna trimmer uses one of four specific head systems, and applying the wrong technique creates more problems than it solves. Stand with your trimmer at eye level and examine the head assembly to determine which system you have before proceeding.
A15B spool system: Look for dual release latches on both sides of the head lid that must be pressed simultaneously to remove the lid. These trimmers require complete spool replacement rather than reloading existing components. Common on Husqvarna 100-series and 300-series battery trimmers.
R25B knob system: Features a prominent knob on top with alignment arrows that must match up during the reloading process. This system allows line replacement without removing the entire spool. Typically found on higher-end Husqvarna battery models like the 520i and select gas-powered trimmers.
Rapid Replace™ system: Designed for professionals, this system uses a cartridge-style mechanism with minimal moving parts. Simply align, feed line, and twist to reload—no winding required. Primarily appears on Husqvarna’s commercial-grade equipment.
Battery push-style heads: Common on compact residential models, these heads detach completely from the shaft with side pressure. The entire head comes off for manual winding of new line.
Check your operator’s manual or equipment identification label for confirmation if you’re uncertain. Never guess—using A15B instructions on an R25B system will damage internal components. Once identified, proceed to the exact reloading procedure for your specific head type.
Fix A15B Trimmer Heads with Dual-Latch Release
The A15B system requires careful handling of its dual-latch mechanism but delivers reliable performance once properly reloaded. Complete this process in under 5 minutes with these precise steps:
Critical first step: Remove the battery pack before touching the trimmer head. This safety measure prevents accidental startup that could cause serious injury while your fingers are near the line mechanism.
Release both latches simultaneously using your thumbs—one on each side of the head lid. Apply firm, even pressure until you feel both latches disengage (you’ll hear a distinct click). Attempting to release one side at a time often breaks the delicate plastic mechanisms.
Remove the empty spool and inspect the cavity for debris. Old line fragments or grass clippings prevent proper seating—use a soft brush to clean thoroughly before inserting the new spool.
Insert the pre-wound replacement spool ensuring it clicks into place. Rotate it manually to confirm free movement—any resistance indicates improper seating that will cause feeding problems later.
Thread both line ends through their respective slots, pulling until equal lengths extend from each side. Uneven line lengths create imbalance during operation, causing excessive vibration.
Pro tip: When reattaching the lid, align the guide pins precisely before pressing down. Forcing the lid creates misalignment that leads to premature latch failure. Press firmly until both latches click—test by gently tugging on the lid.
Final adjustment: Press the advancement button repeatedly until the line extends to the guard knife. This metal blade automatically trims excess line to the proper operating length during your first few seconds of use.
Reload R25B Knob System Without Removing Spool
The R25B system’s knob-based design eliminates spool removal, making it ideal for quick field reloads when you’re halfway through a large property. Follow these steps to avoid common alignment mistakes:
Cut 2.5 meters of fresh line—enough for extended operation but not so much that it won’t wind properly. Using a measuring tape ensures consistency; guessing leads to either insufficient runtime or tangled line.
Rotate the knob until the alignment arrows match—this step is crucial. Misalignment causes line to feed improperly or jam completely. The arrows should form a continuous line when properly positioned.
Insert line through the designated hole until both ends emerge equally. If one side feeds further than the other, unwind completely and restart—forcing it creates internal tangles.
Wind clockwise while maintaining tension—this is where most users fail. Letting the head spin freely creates loose windings that tangle during use. Keep firm hand pressure to ensure tight, even layers.
Warning: Never wind counterclockwise—this reverses the feeding mechanism and causes immediate line jams during operation. The directional arrow on the head housing shows correct rotation.
Complete the process by advancing line until it reaches the guard knife. The trimmer automatically trims excess line during initial operation, so don’t worry about precise length at this stage.
Complete Rapid Replace™ Reload in 30 Seconds

Professional landscapers choose Rapid Replace™ systems specifically for their lightning-fast reloads during commercial jobs. This system eliminates manual winding entirely, but requires precise alignment:
Align the cartridge with visible indicators on the housing—these marks must match exactly. Forcing misaligned components damages the internal feed mechanism.
Feed line through the auto-loading port with minimal pressure. The system automatically positions line for optimal dispensing. Excessive force jams the mechanism.
Twist clockwise until it locks—you’ll feel resistance followed by a distinct click. Test by attempting to twist counterclockwise; if it moves, it’s not fully locked.
Pro tip: Carry pre-loaded cartridges in your work truck for absolute minimum downtime. Professionals maintain multiple loaded cartridges to avoid reloading during customer jobs.
This system’s advantage becomes obvious during extended trimming sessions—you’ll spend more time cutting than reloading compared to traditional spool systems.
Restring Compact Battery Trimmer Push-Style Heads
Residential battery trimmers use simplified push-style heads that detach completely for manual winding. This system requires careful line measurement to prevent overfilling:
Remove the head by pressing both side tabs simultaneously—uneven pressure damages the plastic clips. Once detached, set the head on a clean surface for winding.
Measure line precisely: 3.5 meters for 1.6mm line, 3 meters for 2.0mm line. Thicker line takes more space on the spool—exceeding capacity causes jams during use.
Wind with consistent tension following directional arrows on the spool. Loose windings create “bird’s nests” that jam the head. Maintain firm pressure throughout winding.
Thread line through both exit slots before reattaching the head. Forgetting this step means starting over after you’ve already secured the head to the shaft.
Reattach securely by aligning guide pins and pressing until both side tabs click. A loose head vibrates excessively and may detach during operation—a serious safety hazard.
Choose the Right Line to Prevent Constant Restringing
Selecting inappropriate line causes more reload failures than any other factor. Match these specifications to your specific Husqvarna model:
Diameter matters: 1.6mm for light residential use on smaller battery trimmers, 2.0mm for standard residential models, 2.4-2.7mm for commercial gas trimmers. Using thicker line than specified overloads the motor.
Shape affects performance: Round line works for general grass trimming, square or pentagonal line cuts thicker vegetation more efficiently, twisted line reduces noise but costs more.
Color indicates composition: White line is standard nylon, green indicates reinforced material for heavy-duty use, yellow often signifies specialty formulations for reduced vibration.
Pro tip: Buy Husqvarna-branded line for guaranteed compatibility—third-party lines often have inconsistent diameters that cause feeding problems.
Fix 3 Common Restringing Mistakes Before They Worsen
Even experienced users make these critical errors—recognize and correct them immediately:
Tangled line during winding: Caused by inconsistent tension or incorrect winding direction. Unwind completely and restart, following directional arrows precisely while maintaining firm pressure throughout.
Line won’t advance during operation: Typically results from unequal line lengths or debris in the advancement mechanism. Remove the head and clear any obstructions with a small brush before reloading.
Excessive line breakage: Indicates either inappropriate line thickness for the vegetation being cut or worn head components. Inspect the guard knife—if it’s dull, it fails to trim line properly, causing excessive breakage.
Maintain Your Trimmer Head for Reliable Performance
Prevent reload problems before they occur with these simple maintenance habits:
Clean after each use—remove grass clippings and debris from around the line slots using a soft brush. Built-up material restricts line feeding and causes premature wear.
Inspect monthly for cracks in the housing, worn release mechanisms, or damaged alignment indicators. Catching these issues early prevents complete head failure during critical jobs.
Lubricate according to your manual’s schedule—use only Husqvarna-approved lubricants on moving parts. Standard oil damages plastic components and attracts more debris.
Your Husqvarna trimmer’s head system only performs reliably when properly maintained. Taking five minutes after each use to clean and inspect prevents hours of frustration later. Now that you know exactly how to restring a Husqvarna weed trimmer for your specific model, you’ll spend less time reloading and more time maintaining a pristine lawn. Keep this guide handy for your next line replacement—you’ll complete the job faster each time as these techniques become second nature.
Leave a Reply