Nothing disrupts your yard work flow like a snapped string on your Ryobi weed eater. When that trimmer line breaks mid-task, knowing exactly how to reload it properly saves you from unnecessary frustration and wasted time. A correctly loaded string trimmer delivers clean, precise cuts while reducing motor strain and preventing the uneven patches that make your lawn look haphazard. Whether you’re using a battery-powered Ryobi RY40230, gas-powered RY142300, or any other model in their extensive lineup, mastering the string loading process is essential for maintaining professional-looking landscaping results.
This comprehensive guide walks you through every critical step of reloading your Ryobi weed eater string trimmer, tailored to the specific head type your model uses. You’ll discover how to identify your trimmer’s head mechanism, select the appropriate replacement line, avoid common loading mistakes that lead to tangles, and troubleshoot persistent feeding issues. After reading this guide, you’ll confidently reload your string trimmer in under five minutes—transforming what once felt like a chore into a quick, routine maintenance task.
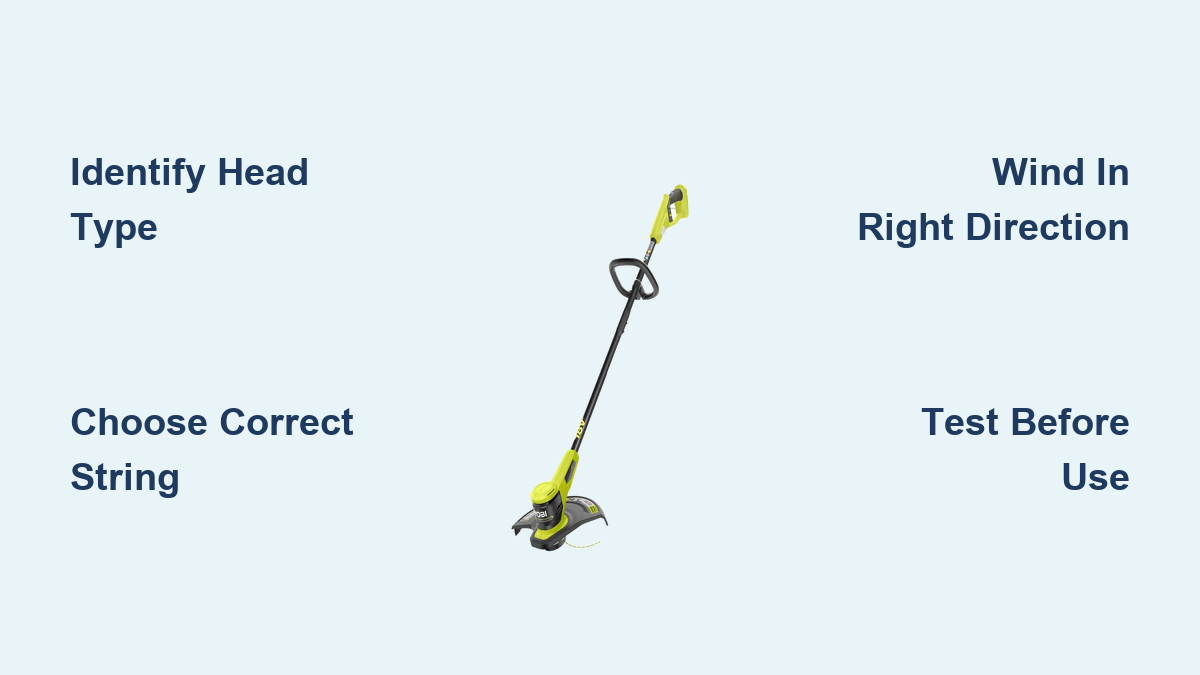
Identify Your Ryobi Trimmer Head Type Before Loading

Before purchasing replacement string or attempting to reload, you must determine which head type your Ryobi weed eater uses. Ryobi manufactures three primary head designs across their product range, each requiring a different loading technique. Using the wrong method for your specific head type leads to constant jams, premature line breakage, and unnecessary wear on internal components.
Fixed-line heads feature a simple spool system where you thread two separate string lengths directly through holes on opposite sides of the head. These older-style heads are common on budget electric Ryobi models and some discontinued gas trimmers. They require manual adjustment as the line wears down, but their simplicity means fewer moving parts to malfunction. Look for a head with visible holes on both sides where string exits directly.
Bump-feed heads represent the most widely used design on current Ryobi string trimmers. These heads contain an internal spool that automatically releases additional line when you tap the head against the ground during operation. Loading requires winding string onto the spool in the correct direction and threading the ends through small exit holes. The bump-feed mechanism automatically advances line as you work, making it ideal for extended trimming sessions.
Automatic-feed heads function similarly to bump-feed models but release line automatically based on motor RPM rather than requiring physical bumps. These heads typically use a single-line system rather than dual-line configurations. Loading procedures resemble bump-feed heads, but you must verify whether your specific model uses single or dual line by checking the owner’s manual or examining the head assembly.
Examine your trimmer head closely for distinguishing features. Ryobi often stamps model numbers on the base of the head assembly or includes them in the part number. If documentation is unavailable, count the number of line exits—single-line heads have one exit hole while dual-line heads feature two opposite holes. This identification step prevents wasted time and materials during the loading process.
Choose the Correct Replacement String for Your Ryobi Model

Selecting the wrong string diameter or type creates immediate performance issues with your Ryobi weed eater. Using line that’s too thick strains the motor and may prevent proper feeding, while line that’s too thin breaks constantly and requires frequent reloading. Ryobi trimmers specify acceptable line diameters in their documentation, typically ranging from 0.065 inches for light trimming to 0.095 inches for heavy-duty applications.
Standard round line (0.065-0.080 inches) works best for most residential Ryobi trimmers handling regular grass and light weeds. This versatile line feeds smoothly through most head designs, offers good durability, and provides sufficient cutting power for routine lawn maintenance. It’s the most economical choice for weekly trimming tasks on established lawns.
Square or star-shaped line (0.080-0.095 inches) delivers more aggressive cutting performance for tackling thick weeds, tall grass, and brush. The angular edges slice through vegetation rather than bouncing off it, making your Ryobi trimmer significantly more efficient in overgrown areas. However, this line wears faster on hard surfaces and can damage delicate landscape edging if not used carefully.
Twisted line offers reduced vibration and quieter operation compared to standard round line. The twisted design creates efficient cutting while minimizing user fatigue during extended trimming sessions. Many homeowners prefer twisted line for large properties where comfort becomes a priority, though it may not cut as aggressively as square-shaped alternatives.
Check your owner’s manual for the exact string specifications for your Ryobi model. If you don’t have the manual, examine remnants of your previous line—Ryobi often prints the acceptable diameter directly on the old spool or head housing. When in doubt, start with 0.080-inch round line, which works well for most Ryobi trimmers handling typical residential yard work.
Prepare Your Ryobi Trimmer for String Replacement
Proper preparation prevents common loading mistakes that lead to tangles and feeding problems. Gather your replacement string, a pair of scissors, and good lighting before starting—you don’t want to fumble for tools mid-process with half-wound string. Work on a clean, flat surface where you can see the small components of the head assembly clearly.
Remove the head cover by pressing the release tabs on either side or unscrewing the center fastener, depending on your model. Most modern Ryobi bump-feed models use spring-loaded tabs that release with firm pressure from your thumbs, while older models may require a screwdriver to remove a center screw. Set aside any springs or washers you encounter—they’re crucial for proper head function.
Clean accumulated grass clippings, dirt, and debris from the housing, spool, and spring. Dried vegetation hardens over time and can jam the feeding mechanism or prevent proper line extension. Use a small brush or toothpick to clean around the line exit holes without enlarging them. A clean head assembly ensures smooth operation after reloading.
Inspect all components for damage before proceeding. Check the spring for rust, breaks, or loss of tension—replace it if it doesn’t return to its original shape when compressed. Examine the spool for cracks, worn slots, or damaged flanges that could cause tangles. Damaged components should be replaced before reloading string to prevent immediate feeding problems.
Load String Onto Your Specific Ryobi Head Type
For bump-feed heads (most common Ryobi models): Locate the directional arrows molded into the spool—these indicate the correct winding direction. Insert one end of your replacement string through the retaining slot, leaving six inches extending out. Wind the string tightly and evenly around the spool in the indicated direction, maintaining consistent tension. Secure the other end in the opposite retaining slot, then reinstall the spring, spool, and cover. Pull gently on both ends to release the line from the slots before testing.
For fixed-line heads (older Ryobi models): Remove the center nut or cover to access the threading holes. Measure and cut two equal lengths of string (12-18 inches). Thread one end through the first exit hole and push it through until it emerges from the opposite hole. Pull equal amounts from both sides to create balanced cutting lengths. Reinstall the cover securely without overtightening.
For automatic-feed heads (newer Ryobi models): These typically use a single-line system. Insert the string end through the center of the spool and pull equal lengths through both sides. Wind according to directional indicators, then reinstall components. Automatic-feed heads require less precise winding than bump-feed models but still need proper tension to function correctly.
Test Your Reloading Before Yard Work Begins

Never skip the testing phase before heading out to trim your lawn. Start your Ryobi weed eater in a safe, open area and let it run at partial throttle. Observe whether the line extends fully from both sides of the head—uneven extension indicates a loading error. On bump-feed models, gently tap the head against a solid surface to verify automatic line advancement.
Listen for unusual sounds during operation. Grinding or clicking noises often indicate tangles inside the head or line caught on internal components. Stop the trimmer immediately if you hear these sounds and inspect for problems. A properly loaded string trimmer should run smoothly without irregular noises or vibrations.
Check line extension length—Ryobi trimmers typically extend 4-6 inches of cutting line. If the line doesn’t extend fully, you may have missed a retaining slot or the line slipped during reassembly. If line feeds excessively, the head mechanism may be damaged or improperly assembled.
Maintain Your Ryobi Trimmer Head for Reliable Performance
After each use, spend two minutes cleaning grass clippings from around the head assembly. Dried vegetation causes more feeding problems than any other factor in string trimmer maintenance. Use a small brush to clean exit holes without enlarging them, as worn holes allow line to retract into the head.
Inspect line exit holes periodically for wear or damage. Worn holes create inconsistent cutting lengths and require more frequent bumping. If holes appear enlarged or irregular, replace the entire head assembly rather than continuing with a damaged component.
Store your Ryobi weed eater with the head protected from direct sunlight and extreme temperatures. UV exposure degrades plastic components over time, making head covers brittle and prone to cracking during routine operation.
Avoid These Common Ryobi String Loading Mistakes
Winding in the wrong direction causes the most frequent feeding problems. Always check for directional arrows on the spool before winding—most Ryobi models wind counterclockwise when viewed from above.
Overfilling or underfilling the spool both create issues. An overfilled spool prevents the cover from seating properly, while an underfilled spool requires constant reloading. Match the amount of new string to what was on the old spool.
Neglecting retaining slots allows line to unwind during reassembly, creating immediate tangles. Always secure both ends in the designated slots before reinstalling the cover.
Skipping the cleaning step guarantees future feeding problems. Take those extra 30 seconds to remove debris from the head assembly—it prevents much longer troubleshooting sessions later.
Reloading your Ryobi weed eater string trimmer becomes second nature once you understand your specific head type and follow proper loading procedures. By identifying your head mechanism, selecting the correct string, preparing components thoroughly, winding properly, and testing before use, you’ll enjoy reliable performance from your Ryobi trimmer season after season. Regular maintenance and correct loading technique extend your trimmer’s life significantly—transforming what once felt like a chore into a quick, routine task that keeps your lawn looking professionally maintained.
Leave a Reply