Nothing disrupts your yard maintenance routine like a snapped or worn-out trimmer line mid-task. Knowing how to change string on your Ryobi cordless weed trimmer ensures you can quickly get back to maintaining clean edges along sidewalks, driveways, and garden beds. Most Ryobi cordless models feature user-friendly bump-feed heads that require simple string replacement when lines break or wear down. Whether you own an 18V One+ model or a more powerful 40V or 80V MAX trimmer, this guide walks you through the entire process in under 10 minutes. You’ll learn how to identify your specific head type, select the correct replacement line, and properly reload your spool for optimal cutting performance.
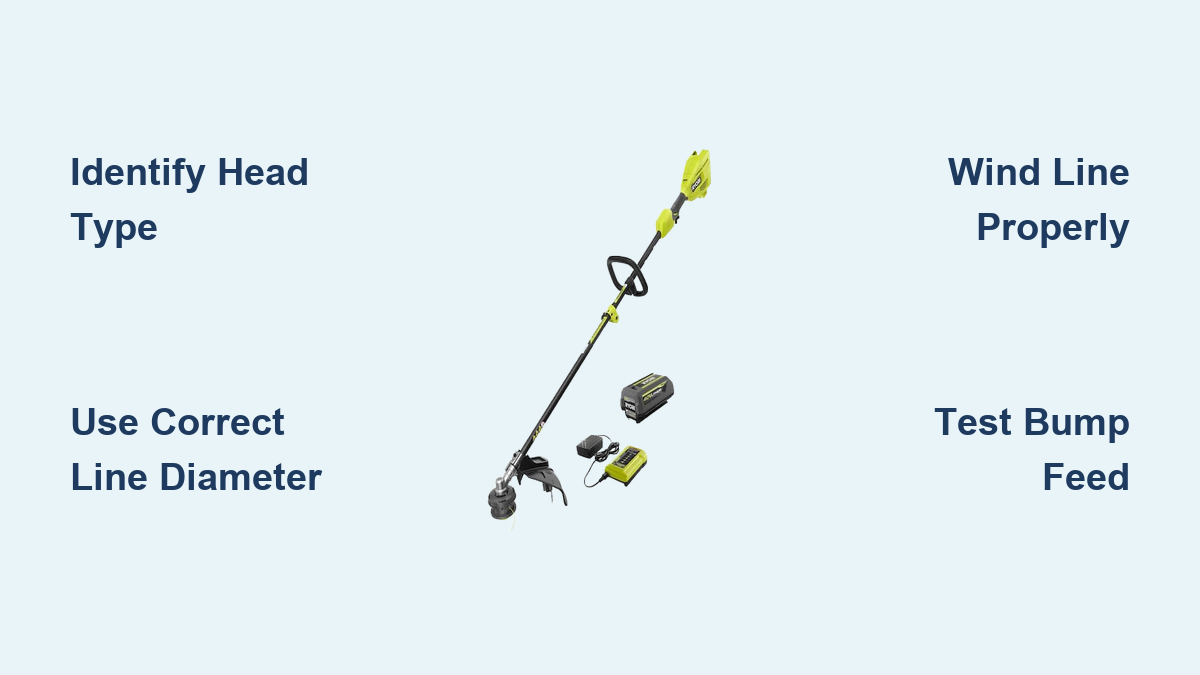
Identify Your Ryobi Trimmer Head Type

Before purchasing replacement line, determine which head design your Ryobi trimmer uses, as each requires a different string replacement approach. Ryobi cordless models primarily feature three head types: bump-feed, fixed-line, and automatic feed systems.
Most residential Ryobi trimmers use a bump-feed system characterized by a curved plastic cap on the head’s bottom with a central button. To identify this system, look for the word “BUMP” or a tap-to-advance symbol on the head. These heads typically accept 0.065-inch to 0.080-inch diameter line and contain a spool holding 20-25 feet of string. When operating, you tap the button against the ground to advance more line.
Some newer Ryobi models feature fixed-line heads with pre-cut string segments permanently installed. These don’t advance line automatically—once the existing line wears down, you replace the entire head assembly. Fixed-line heads are designed for lighter trimming tasks and typically last multiple seasons.
Higher-end commercial Ryobi trimmers may use an automatic feed system with internal sensors that detect when line shortens and automatically advance more string. These heads function similarly to bump-feed systems but eliminate the need for manual tapping.
Confirm your head type by checking your owner’s manual or examining the head directly before purchasing replacement line. Using incorrect line diameter can cause poor cutting performance or damage your trimmer head.
Why Line Diameter Matters for Your Ryobi Trimmer
Selecting the proper line diameter ensures optimal cutting efficiency and prevents motor strain. Most Ryobi One+ 18V and 40V trimmers perform best with 0.065-inch diameter line for standard residential use. If you regularly tackle thick brush or weeds, 0.080-inch line provides greater durability without overburdening the motor. The 80V MAX commercial-grade trimmers typically require 0.080-inch or 0.095-inch line—consult your manual for exact specifications.
When purchasing replacement line, look for nylon copolymer construction with a square or star-shaped cross-section rather than round line. These profiles cut vegetation more efficiently and resist melting from friction heat. Avoid extremely cheap line that appears brittle or has visible imperfections, as this breaks prematurely and leaves debris in your trimmer head.
Essential Tools for String Replacement
Gather these items before starting to complete the job efficiently:
- Correct replacement line for your specific Ryobi model
- Safety glasses to protect your eyes from flying debris
- Work gloves to prevent cuts from sharp line edges
- Flat-blade screwdriver or Ryobi’s included installation tool
- Clean work surface (workbench or table)
- Trash container for old line scraps
- Fully charged battery (for testing after installation)
Most importantly, remove the battery before beginning any work. This crucial safety step prevents accidental trigger engagement while your hands are near the cutting head—a common cause of serious injury.
Access and Replace the String Spool
With your tools gathered and battery removed, position your trimmer securely on a work surface with the head accessible. Clean accumulated grass clippings and debris from around the head using a stiff brush—this prevents contamination of your new string.
Opening the Bump-Feed Head
For bump-feed heads (the most common Ryobi type), locate the center cap on the bottom of the head. Grasp this cap firmly and rotate it counterclockwise to unscrew it from the housing. Some caps have ridged edges for better grip, while others require a screwdriver inserted into a small slot. Apply steady pressure during rotation.
Once removed, pull the cap straight down to expose the internal spool. Note the orientation of any springs or retaining tabs beneath the spool—they’re small and easy to lose. Photograph their positions if helpful for reassembly.
Remove all remaining old line from the spool by pulling it free from the retention slots. Discard the old line properly as tangled or kinked line causes feeding problems. Inspect the spool for cracks or excessive wear—if damaged, replace it rather than reusing.
Loading Fresh String Correctly

Measure approximately 16-25 feet of new line total (8-12 feet per side). Thread one end through a retention slot on the spool, leaving 6 inches of excess extending outward. Repeat with the other end through the opposite slot.
Wind the line onto the spool in the direction indicated by the arrows on the spool itself—this is critical as winding in the wrong direction causes the line to unravel during operation. Most Ryobi spools wind counterclockwise when viewed from outside the trimmer head. Keep the line taut while winding and arrange it in neat, even rows without overlap.
Leave the 6-inch excess tails extending from each side—they’ll thread through the exit holes in the head housing. Don’t wind these tails onto the spool.
Reassemble and Test Your Trimmer Head
Proper Head Reassembly Steps
Align the loaded spool on the central post in the head housing, matching the orientation you noted during disassembly. Press it down firmly until seated completely. Replace any springs or washers beneath the spool in their original positions—these provide the bump-feed mechanism’s tension.
Thread the excess line tails through the exit holes in the outer head housing. Guide each tail through its corresponding hole, pulling gently to remove slack while ensuring the line doesn’t slip back through the spool’s retention slots.
Screw the center cap back onto the head by rotating it clockwise. Hand-tighten firmly but avoid overtightening, which makes future removal difficult. The cap should be snug enough to stay in place during operation but loose enough to allow the bump mechanism to function.
Pull the line tails outward to extend approximately 6 inches of line from each side. If the line retracts, the spool may not be seated correctly—disassemble and verify installation.
Verifying Proper Line Feed Operation
Reinstall the battery and ensure it’s fully charged. Hold the trimmer in a normal operating position with the head elevated above ground level. Engage the throttle and allow the trimmer to reach full speed.
Tap the bump button firmly against a hard surface like concrete. You should feel or hear the line advancing, with fresh string emerging from the exit holes. Repeat several times to verify consistent advancement—each bump should extend about 1 inch of line from each side.
Check for smooth rotation by allowing the trimmer to run briefly at full speed. The line should extend evenly on both sides without wobbling. Uneven extension indicates improper spool centering or uneven winding.
If the feed mechanism doesn’t work correctly, disassemble and verify each installation step. Common issues include the spool installed upside down, line wound in the wrong direction, or debris blocking the bump mechanism.
Maintain Your Ryobi Trimmer for Longevity
After each use, clean the trimmer head thoroughly with a stiff brush to remove grass, dirt, and plant residue. Inspect the line regularly for wear, fraying, or breakage—replace it before it becomes too short to feed properly.
Store your trimmer properly during off-seasons by removing the battery and storing it separately at approximately 50% charge in a climate-controlled location. Hang the trimmer or store it horizontally with the head protected from impact.
Consider upgrading to a heavy-duty head if you frequently experience feeding problems with the standard head. Ryobi offers reinforced heads designed for commercial use that accept thicker line and resist damage from debris.
Troubleshoot Common String Issues
When line doesn’t advance when bumped, verify you’re at full throttle and check that exit holes are clear of debris. If line keeps retracting, clean the retention slots thoroughly or replace the spool if worn.
One side advancing but not the other indicates uneven winding or a blocked exit hole—remove the spool and rewind with more even tension. Excessive line breakage suggests using line too thin for your application or hitting hard objects during operation.
Line welding together inside the head occurs with low-quality string that melts from friction heat. Clean the head thoroughly and switch to higher-quality nylon line with better heat resistance.
By mastering these string replacement techniques, you’ll maintain clean, precise cuts while maximizing the lifespan of your Ryobi cordless weed trimmer. Keep spare line and a backup head available for unexpected breaks during important landscaping projects—this small preparation prevents a minor repair from derailing your entire yard work session.
Leave a Reply